How to Find a Crawl Space Plumbing Leak
Last updated: October 24, 2026
Key Takeaways
- Trace the damp area in short sections until one pipe point wets up again.
- A wet patch shows where to look, not always where the leak starts.
- Stop searching if the problem becomes unsafe or hard to access.
- The usual mistake is following the wettest floor spot instead of the pipe overhead.
Quick Answer
The fastest way to find a crawl space plumbing leak is to dry the suspected area, then check the pipe directly above the wet spot in 1 to 2-foot sections. In many cases, the leaking point will show moisture again within 10 to 15 minutes after you wipe it dry.
A crawl space plumbing leak is usually found by tracing water supply lines, drain pipes, pipe fittings, and the shutoff valve in the same order every plumber would: look for active dripping first, then wet insulation, then plumbing stains, then test the line segments one at a time. In short: start with the fixtures and pipe joints above the damp spot, not with the whole crawl space at once. The EPA’s WaterSense program and the Plumbing-Heating-Cooling Contractors Association both use this kind of leak-tracing approach in their guidance and terminology, and the EPA’s WaterSense leak pages are a useful reference. EPA WaterSense
If you are seeing damp insulation, stained joists, or a musty patch under one bathroom or kitchen, this guide shows how to narrow the leak without guessing. If you suspect sewer gas, have standing water, electrical equipment down there, or you cannot safely enter the space, speak with a qualified plumber or crawl space specialist about your own situation before you proceed.
Who this applies to, and what you need first
This applies when you already know the problem is likely plumbing-related and you want to locate the leaking section, not rebuild the crawl space. It assumes you can get into the space safely, can identify a main shutoff valve, and know which rooms sit above the area. You do not need special tools beyond a bright flashlight, dry paper towels, a dry rag, and something to mark wet spots, such as painter’s tape.
This is not the right approach if the water seems to come up through the ground after rain, if the floor feels soft from rot, or if the space is too cramped to move without touching pipes and joists. A plumbing leak in a crawl space often shows as isolated moisture near a pipe run, while groundwater usually spreads more broadly. That distinction matters because the fix path is different.
A useful starting point is to know the plumbing layout before entering. Supply lines usually carry pressurized water to fixtures; drain pipes move wastewater away by gravity. Supply leaks often show active dripping even when nobody is using water, while drain leaks often show up after sinks, tubs, or toilets are used. The Environmental Protection Agency’s WaterSense program explains the broader idea of water-loss tracing on its leak-related pages, and the Plumbing-Heating-Cooling Contractors Association is a good professional reference for pipe and fixture terms. If you want a deeper overview, our how a plumbing system works guide covers the basics.
How to find the leak, step by step
Because the leak source is often smaller than the damp area, start at the lowest visible point and work back toward the source in 1 to 2-foot sections. The best result is often a single pipe segment, fitting, or valve that gets wet again after being dried, while nearby sections stay dry.
- Dry the suspect area completely. Wipe the pipe, nearby insulation, and the wood below it with a dry rag or paper towels for about 2 feet in each direction. Verify that the metal or plastic surface is dry enough to leave no wet mark on the towel. If the area stays damp after wiping, you may be dealing with condensation or water from another source, not an obvious active leak.
- Look directly above the wettest spot. Follow the stain line upward to the pipe that runs over it. Check whether the line is a water supply line, a drain pipe, or a vent. Verify whether the leak appears to start at a fitting, a threaded joint, a glued joint, or a valve body. If the wet spot is under a pipe but the pipe above is dry, the source may be in the insulation, a joist pocket, or a different line nearby.
- Inspect all pipe joints within 3 feet. A close look at fittings, not just pipe length, matters here. A joint leak often leaves a mineral track, rust stain, or dark ring at one side of the joint rather than along the whole pipe. If a joint is only stained on the underside, that often means water is hanging on the fitting and dripping later. If every joint is clean, move farther along the line instead of stopping at the first pipe you see.
- Check for active dripping with a dry tissue test. Hold a dry tissue or folded paper towel under each suspected joint for 20 to 30 seconds. Verify whether the tissue picks up fresh moisture from one point. If it does, mark that spot with tape. If the tissue stays dry, the moisture may be intermittent and tied to fixture use or pressure changes.
- Test the shutoff valve upstream of the suspected line. Close the nearest shutoff valve fully, then wait 10 to 15 minutes while watching the marked spot. A shutoff valve is the valve that stops water to a branch line or fixture. If the dripping slows or stops, the leak is on the downstream side of that valve. If the wet spot keeps growing, the leak may be on another line or the valve itself may be passing water.
- Run one fixture at a time above the crawl space. Have someone flush a toilet, run a sink for 1 to 2 minutes, or fill and drain a tub while you watch the pipe below. Verify whether the leak appears only during that use. A drain-pipe leak often shows during discharge; a supply leak usually does not depend on fixture use in the same way. If you cannot connect the timing to a specific fixture, the leak may be on a hidden branch or in a wall cavity.
- Check wet insulation and the underside of subflooring. Press gently on insulation and joists near the line. Wet insulation often clumps, sags, or feels cold and heavy, while stained wood may show a brown edge or mineral residue. Verify whether the dampness is directly below one pipe or spread across a wider area. If several feet of insulation are wet, the leak may be traveling along the pipe before dripping off the lowest point.
- Repeat the dry-and-watch test on the next section. Move 2 to 3 feet farther along the line, dry it again, and recheck after 5 to 10 minutes. The true source is usually the first spot that becomes wet again after you clear the surrounding surfaces. If multiple spots wet up at once, suspect a long crack, a failed fitting, or more than one leak.
A simple way to stay organized is to mark each checked point with painter’s tape and write the time on it. That turns a vague damp area into a path you can compare after 15 minutes. The crawl space water intrusion diagnosis hub goes deeper on broader moisture patterns, but this page stays focused on plumbing lines and pipe behavior.
What crawl space plumbing leak signs mean
A wet patch is not the same as a leak source. The sign tells you where to look next, and the pattern matters more than the size of the stain.
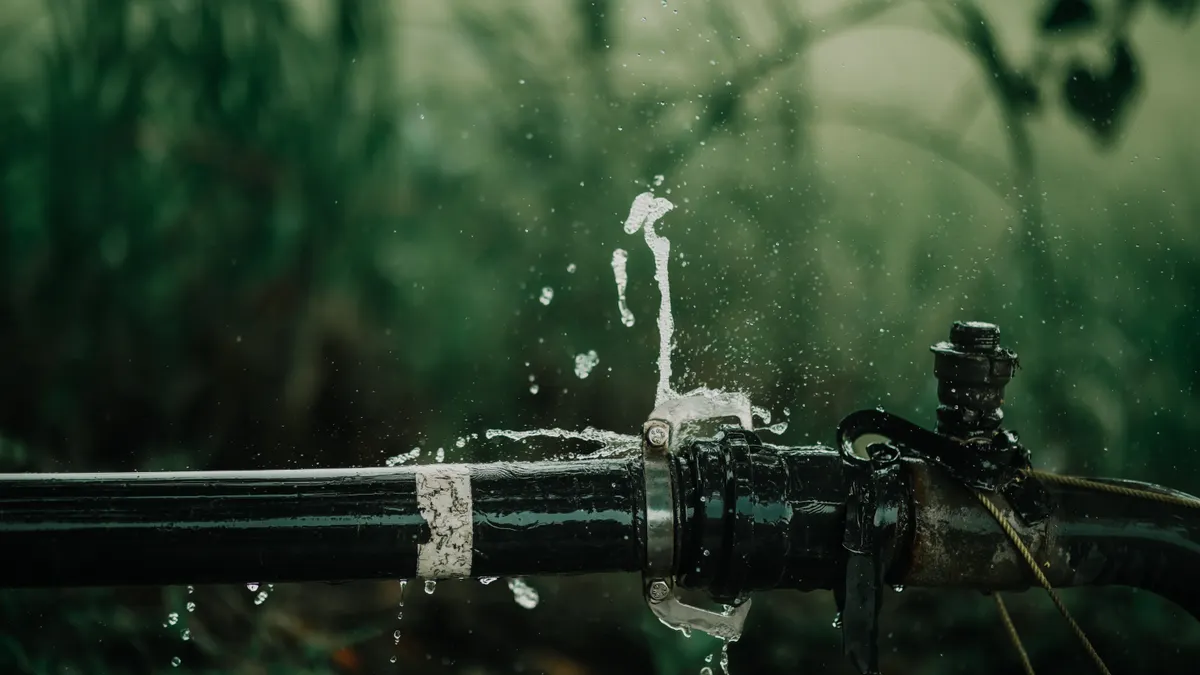
Active dripping usually points to a pressurized supply leak or a drain line that opens only when water flows. A tiny drip from a compression nut, union, or corroded fitting can soak insulation without making a loud sound. If you see a bead forming under a fitting every few seconds, the fitting is more useful than the pipe length for your search.
Plumbing stains often look like rust streaks, white mineral crust, or brown water marks on wood. Those stains can remain long after the leak slows, so they tell you there has been moisture there, not necessarily that the spot is still leaking now. A stain directly below a joint is stronger evidence than a broad stain under a whole run.
Wet insulation is a clue because it holds water and spreads it downward. If insulation near one elbow is soaked but the pipe above it looks dry, the leak may be very small or may occur only at certain times. If the insulation is wet along a long section of pipe, look for a loose strap, a bowed line, or a fitting that leaks only when the pipe flexes.
Drain pipes behave differently from supply lines. A drain leak often shows after water use, and it can leave a dirty or gray stain rather than a clear-water mark. Supply leaks are more likely to leave clean moisture unless the water picks up rust or soil on the way down. That difference helps you decide which fixtures to test first.
When to stop looking and get qualified help
Therefore, stop the search if the situation stops looking like a simple pipe leak and starts looking like a safety or access problem.
Standing water reaches electrical wiring or equipment: This raises shock risk and makes the area unsafe — leave the space and call a qualified plumber or electrician as appropriate.
You smell sewer gas or see damaged drain piping: The problem may involve a sanitary drain or vent issue, not just a water leak — avoid extended time in the space and get professional help.
The leak is at a gas water heater or near combustion equipment: Moisture can affect venting, burners, or controls — do not keep opening the area up without an HVAC or plumbing professional.
The pipe is cracked, split, or badly corroded over more than a short section: Small tracing steps are unlikely to solve it — the damaged section probably needs repair or replacement.
The subfloor or joists feel soft, swollen, or visibly sagging: The moisture may already have caused structural damage — stop the inspection and have the area evaluated before walking farther.
You cannot isolate the leak after testing the shutoff valve and one fixture at a time: The source may be hidden in a wall, under insulation, or on another branch — a more complete diagnostic approach is needed.
A general rule: if the moisture pattern changes the structure, air quality, or safety of the space, the job is no longer just leak finding. It becomes a repair-and-assessment problem, and a professional should take over.
Mistakes that send people in the wrong direction
The most common error is chasing the wettest floor spot instead of the pipe above it. Water runs along wood, wire, and insulation before it drips, so the stain on the ground may be several feet from the source. The better move is to work upward from the stain and inspect the first pipe segment directly overhead.
Another mistake is testing too many fixtures at once. If someone flushes a toilet, runs a sink, and starts a shower at the same time, the timing becomes useless. The correct alternative is one fixture at a time, for 1 to 2 minutes, with a clear watch on the same pipe section.
People also wipe a pipe once and call it dry. A line can look dry at noon and drip again under pressure at 12:15. The fix is to dry the area, mark it, and return after a short wait or after the fixture runs again.
A fourth error is assuming every wet spot means a supply leak. Drain pipes, failed trap arms, loose fittings, and even a clogged line can create moisture patterns that look similar at first glance. The right response is to match the timing of the leak to fixture use before you decide which pipe type is involved.
Finally, some people ignore wet insulation because the pipe itself looks fine. Wet insulation is not proof of a leak by itself, but it is often the first material to tell the truth. If insulation near one joint is saturated while the rest stays dry, that joint deserves a closer look.
What changes in tight spaces and older plumbing
Because tight spaces change the method, you may not be able to see the whole run at once. Use a mirror, a phone camera, or a bright flashlight to inspect the upper side of pipes that are hidden against joists. In a shallow crawl space, spend more time on touch and timing, because sight lines are poor.
Older plumbing needs a different eye. Galvanized steel can show rust at threaded joints, and copper often leaves greenish staining where water has been sitting. PVC drain lines may fail at glued joints or where a support strap has loosened. Those material clues do not prove the source, but they tell you where failure is more likely.
If the leak is intermittent, keep the search going after the space dries. Some leaks only appear when a bathtub drains, when a washing machine discharges, or when water pressure rises during peak household use. A 10-minute watch immediately after use is often more useful than staring at a dry line for an hour.
If the pipe is insulated, pull back only enough insulation to inspect the joint and replace it carefully afterward. Do not rip off large sections just to look; that can hide the evidence you are trying to read and can leave more of the pipe exposed than before.
Ultimately, the right outcome is not always a visible burst pipe. Sometimes it is a single damp coupling, a drip at the base of a valve, or a drain joint that only leaks when loaded. Finding that narrow source is what keeps the repair focused.
How can I test whether a pipe in the crawl space is leaking?
A simple test is to dry the pipe, mark the spot, and watch it for 10 to 15 minutes after closing the nearest shutoff valve or running one fixture. If the same point becomes wet again, that section is suspect. If it stays dry while nearby pipe wets up, the leak is probably elsewhere.
What does a crawl space plumbing leak look like?
A crawl space plumbing leak often shows as wet insulation, a stained patch on wood, a mineral ring around a fitting, or active dripping under a joint. The first clue is usually local and narrow, not spread evenly across the whole space. Drain leaks often look dirtier; supply leaks often look cleaner.
Can a small leak make a crawl space damp?
Yes, a small leak can make the space damp over time. Even a slow drip can soak insulation, stain wood, and keep the nearby air humid, especially if it repeats every time a fixture is used. The key is that the dampness usually stays close to one pipe run or joint, which helps narrow the source.
Drafted with AI; not yet reviewed by a person.