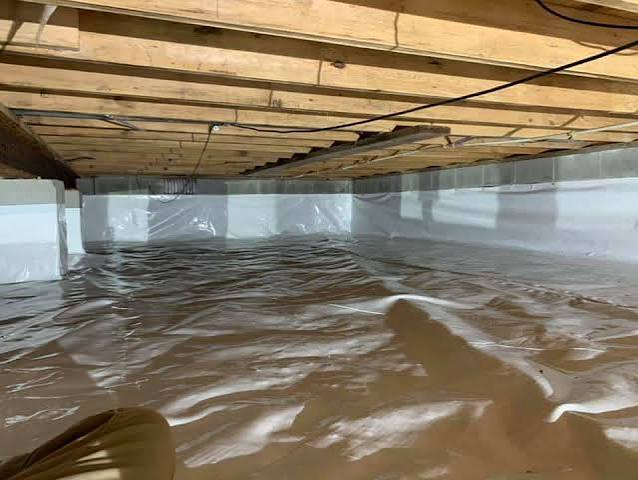
Crawl Space Water Damage & Mold Solutions — The Complete Guide
Last updated: September 10, 2026
Key Takeaways
- Relative humidity stays under about 60% rather than bouncing into the high 60s or 70s.
- Run a dehumidifier sized for the space, or keep mechanical drying going until relative humidity is lower and steady, ideally under 60%.
- Check with a hygrometer for at least 24 to 48 hours to confirm humidity is holding, not just dropping for a moment.
- Use polyethylene sheeting that overlaps seams by about 12 inches and is sealed where practical to reduce soil evaporation into the space.
Start here: crawl space water damage & mold solutions — complete guide depends on one simple sequence. Stop the moisture source. Dry what can be saved. Remove what cannot be saved. Then keep crawl-space humidity low enough that mold does not keep coming back. Standing water? Damp insulation? Musty air upstairs? Visible mold under the floor? The question is not “can I bleach it?” It is “how do I dry the space, stop the water, and keep the humidity low enough that mold stops coming back?” This guide to crawl space water damage & mold solutions — complete guide sticks to that order.
Who this guide is for — and who should stop and call someone
This guide to crawl space water damage & mold solutions — complete guide is for a homeowner or property manager dealing with a vented or unvented crawl space, a dirt or concrete crawl floor, and signs of dampness after rain, plumbing leakage, condensation, or poor drainage. I am assuming you can look into the crawl space safely, know where your water shutoff is, and can tell the difference between a wet joist, wet soil, and an active leak. I am also assuming you are trying to solve the problem, not just make the smell go away.
Not every crawl space belongs in the DIY pile. More than a thin film of water? Stop. If the subfloor feels soft, if you see sagging insulation full of water, if electrical equipment is wet, or if sewer water has entered the space, the job moves from cleanup to hazard control. In those cases, stop entry, isolate power if needed, and get a qualified water-damage, mold, or structural pro involved. Suspect asbestos insulation, lead-painted debris, or a dead-animal contamination issue? Stop there too. Those are not “clean it and dry it” problems.
The target here is a crawl space that can be made dry, durable, and inspectable. That usually means getting the moisture source under control, drying materials that can be saved, removing what cannot be saved, and then preventing humidity from climbing back above the range where mold grows easily. In practical terms, the goal is usually to keep crawl-space relative humidity around or below 60% after the repair, using a dehumidifier or a properly detailed vapor barrier when the space is encapsulated. For more on crawl-space moisture control, see the U.S. EPA’s guidance on mold and moisture and the Department of Energy’s crawl-space recommendations.
What actually causes crawl space water damage and mold?
Crawl space water damage starts when liquid water or water vapor gets into a space that cannot dry fast enough. Mold follows when damp organic material stays wet long enough. That is the whole chain, and if you miss the first link, every cleanup step is temporary.
Rainwater can sneak in through poor grading, short downspouts, clogged gutters, or foundation cracks. Ground moisture can also move upward through bare soil in a crawl space by evaporation. Plumbing leaks may drip for weeks before anyone notices. Cold supply pipes, HVAC ducts, or the underside of subflooring can collect condensation when humid air hits a cool surface. In a vented crawl space, outside air can actually add moisture on hot, humid days. In an encapsulated crawl space, a torn vapor barrier or failed dehumidifier can do the same job in a different way.
The part people miss most? “Dry-looking” does not mean dry enough. Wood framing can hold a lot of moisture before it visibly changes color. Mold can colonize behind insulation, on the back side of rim joists, and along the dust layer on floor joists long before the room above smells strong. I would treat musty odor, rusted fasteners, cup-shaped subfloor edges, or recurring allergy symptoms after rain as signs that the crawl space has a moisture problem even if there is no puddle; if those signs persist or the area is extensive, consult a qualified water-damage or mold professional. The EPA notes that visible mold, odors, and repeated moisture are all warning signs that merit investigation. Sneaky stuff. It hides in plain sight.
Mold itself is not the first problem; it is the result. The usual indoor mold genera in wet crawl spaces include Cladosporium and Aspergillus/Penicillium-type growth, which are common environmental molds rather than some exotic species. The practical question is not the species label. It is whether the material is contaminated, how much surface area is affected, and whether the source of moisture is still active. Cleaning alone is a short-lived fix when the source stays active. See the EPA and CDC guidance on moisture control and mold cleanup for general principles.
What to check before you do anything else
Before you touch anything, inspect the water source, the amount of material affected, the humidity, and the condition of the framing. That first pass is about deciding what is salvageable, not about ripping things out.
Start with the obvious clues: standing water, wet soil, wet insulation, rust on fasteners, staining on the sill plate, and darkened wood on joists and subfloor. Check whether the water seems localized near a pipe, widespread along the perimeter, or tied to one side of the house after rain. Look for white efflorescence on masonry; it often means moisture is moving through concrete or block. If there is a sump pit, confirm that the pump runs, the discharge line sends water away from the foundation, and the pit is not clogged with sediment.
Measure crawl-space relative humidity if you have a basic hygrometer. Take readings at more than one point, ideally after the space has sat closed for several hours. A reading in the high 60s or above is a warning that mold prevention is not working. If you have a moisture meter for wood, compare joists near the wet area with drier framing elsewhere. You do not need a lab-grade instrument to see the pattern: wet framing will usually read noticeably higher than dry framing. No instrument? The repeat pattern of odor, staining, and recurring dampness matters more than a single visual check. For practical reference, the EPA and building-science guidance commonly use 60% relative humidity as an upper limit for controlling mold risk.
One common mistake is opening the crawl-space hatch on a muggy day and letting in a burst of humid air, then assuming the space is “ventilated.” That can make the moisture problem worse. Another is spraying a little cleaner on visible mold while the soil stays wet and the downspout still dumps next to the foundation. That treats the symptom, not the source; if the area is large or the smell keeps returning, consult a qualified pro and use EPA mold guidance as a baseline. A quick spritz is lipstick on a pig.
How do you fix crawl space water damage step by step?
You fix crawl space water damage & mold solutions problems by stopping the water, removing unsalvageable material, drying the structure, and then controlling future humidity. Reverse that order, and the mold comes back.
- Stop the active water entry first. Shut off a leaking supply line at the valve, extend downspouts at least 4 to 6 feet away from the foundation, and clear obvious gutter backups before anything else. Make sure the leak stops or the discharge point changes. If water still enters after the shutoff, the problem is coming from the site grading, the drainage system, or groundwater, not the crawl-space contents.
- Remove standing water with the right equipment. Use a wet vacuum for shallow pools or a sump pump for deeper water, and keep the discharge line far enough away that it does not loop back to the foundation. Confirm that the crawl floor is no longer glossy with standing water. If the pump cycles on and off rapidly or keeps losing prime, the pit may be clogged or undersized.
- Pull out wet insulation and debris that cannot dry fast enough. Fiberglass batts that are waterlogged, fallen, or contaminated with mold should come out. Bag debris, old cardboard, and soaked dust-collecting material. Make sure the joist bays are open to airflow. If the insulation drips when squeezed or smells earthy after partial drying, it is usually a removal candidate, not a restoration candidate.
- Expose the wood so it can dry. Remove plastic sheeting that traps moisture against framing only if you are replacing it with a proper vapor barrier later. Open access panels, run air movement through the space, and keep fans aimed to move air across surfaces rather than directly into piles of debris. Confirm that joist faces, sill plates, and subfloor edges are actually drying, not just the air in the crawl space. If condensation forms on cooler surfaces, the space is still too humid.
- Clean mold from non-porous and semi-porous surfaces. Use detergent and water first, then a mold-cleaning product appropriate for the surface, following the label. For bare wood with superficial growth, scrubbing with a detergent solution and wiping away residue is usually more useful than drowning the area in disinfectant. Confirm that visible growth is gone and that the surface is not still slimy or stained with active residue. When the material is soft, punky, or deeply colonized, cleaning is not enough.
- Dry the crawl space to a stable moisture level. Run a dehumidifier sized for the space, or keep mechanical drying going until relative humidity is lower and steady, ideally under 60%. Check with a hygrometer over at least 24 to 48 hours that humidity is holding, not just briefly dropping. If humidity rebounds every night, outside air or soil moisture is still feeding the space.
- Repair the moisture source that caused the damage. That may mean grading soil away from the house, adding gutters or longer downspout extensions, sealing foundation cracks, repairing plumbing, insulating pipes, or fixing the sump system. Check after the next rain that the crawl space stays dry. If the same wet spot returns, the root cause is still there.
- Install a proper ground vapor barrier if the crawl space stays accessible. Use polyethylene sheeting that overlaps seams by about 12 inches and is sealed where practical to reduce soil evaporation into the space. Confirm that the barrier covers bare soil and is not punctured or bunched into low spots that trap water. If water flows under it freely or it tears during installation, it is not doing its job.
- Re-insulate only after the moisture problem is under control. Replace insulation that was removed, and use a method suited to your crawl-space design. Make sure new insulation stays dry and supported. If new batts sag, contact the soil, or get wet again within a season, the crawl space still has an unresolved moisture source.
The order matters because drying a crawl space without fixing the source just buys time. A good result looks dull: dry wood, no standing water, no persistent musty odor, no visible mold regrowth, and humidity that stays controlled through several weather changes. A bad result looks busy: fresh paint or cleaner smell, but recurring stains, rewet insulation, and a dehumidifier that runs constantly because the crawl space still leaks moisture. For related steps, see our crawl space encapsulation guide and foundation drainage guide.
Should you clean mold in a crawl space yourself?
You can handle a small, local mold cleanup yourself if the affected area is limited, the materials are non-porous or only lightly contaminated, and there is no sewage, no structural damage, and no hidden spread behind finishes. You should not try to “DIY” a crawl space that has broad mold coverage, soaked insulation over a large area, or damp framing that has stayed wet for weeks.
The practical line is less about the mold label and more about the extent and the substrate. Mold on a painted metal strap, PVC pipe, or a patch of concrete is a cleaning job. Mold spread across multiple joist bays, the underside of subflooring, or HVAC duct insulation is a different job. The more porous the material, the less useful simple cleaning becomes. Porous material holds spores and residues in depth, which means the visible surface can improve while the contamination remains. The CDC and EPA both advise caution when mold covers a large area or when hidden damage is suspected.
For DIY cleanup, I would use gloves, eye protection, a respirator rated for particulates such as N95 or better, and old clothing you can wash hot or discard. Do not dry-scrape dusty mold, because that throws particles into the air. A HEPA vacuum is useful for final cleanup on dry debris, but it is not a substitute for removing wet, contaminated insulation. If you use a cleaner, choose one meant for the surface and follow the label rather than mixing chemicals.
There is a trade-off people dislike hearing: aggressive scrubbing on rough wood can remove surface growth, but it can also rough up the grain and spread dust if the wood is already compromised. That is why I prefer to solve the moisture source first and then clean the smallest area needed to restore the surface. If the wood is structurally sound and the growth is superficial, cleaning plus drying is usually enough. If the wood is soft, swollen, or smells strongly after drying, it may need removal or encapsulation by a qualified contractor. EPA guidance on mold cleanup stresses fixing the moisture source before or during remediation.
When should you stop and bring in qualified help?
You should stop and bring in qualified help when the crawl space is wet enough, contaminated enough, or structurally affected enough that a cleanup could miss the real hazard. This is a safety and building-performance decision, not a pride test.
Standing water covers more than a small puddle: This means the crawl space has active water intrusion or failed drainage, and drying alone may be too slow — stop and get water extraction and drainage assessment.
Electrical components, junction boxes, or equipment are wet: This creates shock and fire risk — do not enter until power is isolated and a qualified electrician has checked the area.
Sewage or backflow has entered the crawl space: This is a contamination problem, not a standard mold cleanup — avoid contact and use a qualified remediation company familiar with biohazard waste.
Framing feels soft, sagging, or bouncy: This can mean rot or structural loss — do not assume drying will restore it; get a structural carpenter or engineer involved.
Mold covers a broad area of framing, sheathing, or duct insulation: Widespread contamination usually exceeds the value of spot cleaning — have it assessed for removal, isolation, or full remediation.
You suspect asbestos-containing materials or lead-painted debris: Disturbing old insulation, pipe wrap, or debris can spread hazardous dust — stop and use a licensed abatement path if needed.
The odor returns after the space dries for 24 to 48 hours: That often means moisture is still present inside hidden cavities or under the floor system — the source has not been solved.
The crawl space floods after rain or during seasonal high groundwater: Chronic flooding overwhelms routine cleanup — you need drainage, sump, or waterproofing work before any mold solution will stick.
I am being blunt here for a reason: some crawl spaces are not cleanup jobs; they are repair projects. Guessing wrong usually means more water, more mold, and more damage hidden behind fresh materials.
The mistakes people actually make, and what they cost
The biggest mistake is treating mold as the enemy and water as a side issue. That usually leads to a clean-looking crawl space that gets wet again in the next storm. The correct alternative is to identify the entry path and fix it first, and if the problem keeps returning, consult a qualified crawl-space or mold professional.
Another common mistake is putting a plastic vapor barrier over wet soil or damp debris without drying and cleaning first. That traps moisture, feeds odor, and can hide ongoing leaks. The better approach is to remove wet materials, dry the space, and then install the barrier on a clean base.
A third mistake is leaving soaked fiberglass insulation in place because it “still looks full.” Wet insulation loses performance, sags, and can hold spores and dirt against the wood. The consequence is higher humidity and more contamination. The correct alternative is removal and replacement only after the crawl space is dry.
A fourth mistake is spraying strong disinfectant and calling the job done. That can bleach the surface color without removing the moisture source or the organic film mold feeds on. The alternative is detergent cleaning on appropriate surfaces, followed by drying and source control, with a professional assessment if the damaged area is large or keeps returning.
A fifth mistake is using the crawl-space door or vents as a drying strategy on humid days. In a damp climate, that can add moisture instead of removing it. The better path is mechanical drying and humidity monitoring, not hope. If you need outside air, use it selectively and only when its dew point is favorable, not just because the air feels cooler.
A sixth mistake is ignoring gutters, grading, and downspouts because the crawl space itself is where the damage shows up. That is like mopping a floor under a dripping ceiling. Fixing roof and site drainage can be one of the least expensive parts of the project, and it often prevents the next one.
What changes in a vented crawl space versus an encapsulated one?
The right fix depends on whether the crawl space is vented, semi-conditioned, or fully encapsulated, because moisture moves differently in each setup. This is where generic advice goes wrong.
In a traditional vented crawl space, outside air enters through vents. In a hot, humid climate, those vents can introduce damp air that condenses on cooler surfaces. In that case, the answer is often not “more ventilation,” but better ground coverage, sealed air leaks from the house, insulation strategy adjustments, and dehumidification. If the crawl space is cold in winter and the floor above is cold too, condensation patterns may shift, so a one-size-fits-all vent rule is weak advice.
In an encapsulated crawl space, the soil is covered with a sealed vapor barrier and the walls are often insulated instead of the floor above. The setup changes the drying path. Air leaks from the house matter more, and a dehumidifier or conditioned-air strategy may be needed to keep RH controlled