Crawl Space Moisture & Encapsulation Basics — The Complete Guide
Last updated: September 10, 2026
Key Takeaways
- Enter the crawl space within 24 hours of rainfall and note standing water, damp soil, efflorescence on masonry, rusted metal, dripping pipes, or wet insulation.
- Measure relative humidity if you can; above about 60% for long periods is a warning sign.
- Overlap seams by at least 6 inches, and seal them with the manufacturer’s tape or mastic.
- Extend downspouts at least 6 feet away from the foundation if local conditions allow, and make sure the yard slopes away from the house.
Moist crawl spaces are not a small nuisance. They can quietly rot framing, stain masonry, and drag humid air into the rest of the house. This crawl space moisture & encapsulation basics — complete guide lays out when moisture becomes a control problem, what encapsulation actually does, and when it is smarter to call a pro. Straight answer: if the crawl space under your house stays damp, the floor framing, insulation, ductwork, and even indoor air can suffer. Encapsulation is the method I would use when that space needs to be turned from a wet, vented cavity into a dry, conditioned one: seal the ground, control air leaks, manage bulk water, and keep humidity in check.
Who this guide is for — and who should do something else

Homeowners who notice musty odors, damp soil, sweating ductwork, rust on fasteners, sagging insulation, or a crawl space that never really dries out are the people this crawl space moisture & encapsulation basics — complete guide is meant for. It assumes you can safely enter the crawl space, tell standing water from damp surfaces, and recognize the difference between a ground vapor barrier and a full encapsulation system. You should also already know the basics of home maintenance: where the downspouts end up, whether gutters overflow, and whether the grade around the foundation pitches toward the house.
I am writing for the person who wants enough detail to decide what to tackle and what to hand off. Some jobs are fair game for a DIYer. Others are not. I would not treat a crawl space as a beginner project if there is standing water more than a shallow puddle, visible fungal growth across framing, damaged joists, collapsed duct insulation, active sewage, electrical hazards, or a dirt floor that stays wet after 24 to 48 hours of dry weather. In those situations, consult a professional before starting; the issue is more likely drainage, structural, or health-related than a liner issue. Cheap fix? Not here.
If the crawl space is low enough that you cannot work safely for long periods, if you need to disturb insulation near wiring, or if the space contains a sump, dehumidifier drain, or plumbing that may need rerouting, qualified help is the better call. That is not a dodge. It keeps you from sealing in a mess while the real water source is still active. Encapsulation works best once the source of moisture is understood first.
One more assumption: you are not after a decorative fix. The goal is to cut moisture movement into the crawl space enough to keep framing dry and humidity stable. Usually that means a ground vapor retarder, air sealing, drainage management, and often mechanical dehumidification. A liner by itself is not the whole job. For broader context, see the U.S. Department of Energy’s guidance on crawl spaces and the EPA’s mold moisture guidance, and compare with local code requirements before beginning U.S. DOE and EPA.
Why crawl spaces get wet in the first place
Three routes, mostly: bulk water, vapor diffusion, and humid air. Bulk water is the easiest one to spot. It comes from gutters that dump near the foundation, surface water that slopes toward the house, failed drain piping, plumbing leaks, or groundwater that rises after heavy rain. See a puddle on the floor or water staining on the foundation wall? Start there before talking about encapsulation.
Vapor diffusion is slower and harder to notice. Moisture moves through soil and concrete as water vapor. A bare dirt floor is a direct moisture source; even when it looks dry, it can release enough water to keep crawl space humidity high. Concrete blocks and unsealed masonry can also pass moisture, especially in older foundations.
Humid air is the third route. Outside air enters vented crawl spaces and carries water vapor with it. That can help in a dry climate during the right season, but in many humid climates it makes the crawl space wetter, not drier. Warm outdoor air hitting cooler crawl space surfaces can reach the dew point, which is the temperature at which air can no longer hold all its moisture and condensation begins. Summer is where that goes sideways fast. The house above may feel fine while the crawl space turns into a condensation chamber.
The signs of trouble are usually the same: damp or cupped wood, mildew smell, rusting metal, falling insulation, mold on joist bays, and condensation on ducts or pipes. A crawl space dehumidifier does not automatically mean the space is fixed. If water keeps entering, the machine is just trying to outrun the physics.
I would be especially wary of any crawl space that gets wet after rain. That pattern points to a water-management issue outside the crawl space, not a humidity issue inside it. Encapsulation can help, but it should never be the first move if gutters, grading, or drainage are failing. The DOE’s guidance on air sealing and moisture control lines up with that order, and so do building-science recommendations from BPI and ASHRAE DOE, BPI.
What encapsulation actually does
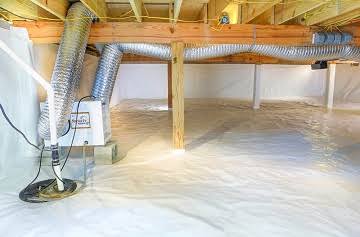
Encapsulation isolates the crawl space from ground moisture and outside air, then manages whatever moisture is left with drainage, sealing, and dehumidification. A true encapsulation is more than laying down plastic. It usually includes a thick ground vapor retarder, sealed seams, sealed piers, air sealing at the rim joist, and sometimes insulation and conditioned or dehumidified air.
The ground layer is the heart of it. A vapor retarder is a sheet material that slows water vapor movement; in crawl spaces this is usually polyethylene or a similar membrane. In practice, I look for a liner thick enough to hold up under foot traffic and service work, not a flimsy sheet that tears the first time someone crawls over a rock or sharp grade beam edge. The membrane should overlap seams by several inches and be sealed with compatible tape or mastic. Loose laps do little. The DOE and EPA both recommend durable vapor-control detailing rather than loose ground cover DOE, EPA.
Encapsulation also changes the air pathway. Open vents, gaps at the sill plate, and unsealed penetrations allow humid outdoor air to enter. Sealing the crawl space reduces that exchange. In many homes, the rim joist — the band board at the outer edge of the floor framing — is a major leakage point. Air sealing there makes a real difference because it cuts off a large path for moisture-laden air. If the rim joist area is damaged or hard to access, consult a professional before sealing around it.
Here’s the trade-off: a sealed crawl space that is not drained or dehumidified can trap water vapor from the soil, leaks, or masonry. So I do not treat encapsulation as a cosmetic cover-up. It has to be paired with control of the water source. If the site has chronic drainage problems, an interior drain or sump may be part of the plan. If the crawl space stays humid because of climate and building leakage, a dehumidifier may be necessary.
Encapsulation is not the right tool if the foundation itself is failing, if there is active groundwater pressure against the walls, or if the crawl space is too irregular and exposed for a membrane to be sealed properly. In those cases, fix drainage or structural issues first. For projects in the U.S., local code and manufacturer instructions should be checked before work begins ICC.
How to encapsulate a crawl space, step by step
Stop bulk water, clean and dry the space, seal air leaks, install and seal the ground membrane, address insulation and vents, then control humidity. That is the order I would use. Reverse it, and you may hide the problem without solving it.
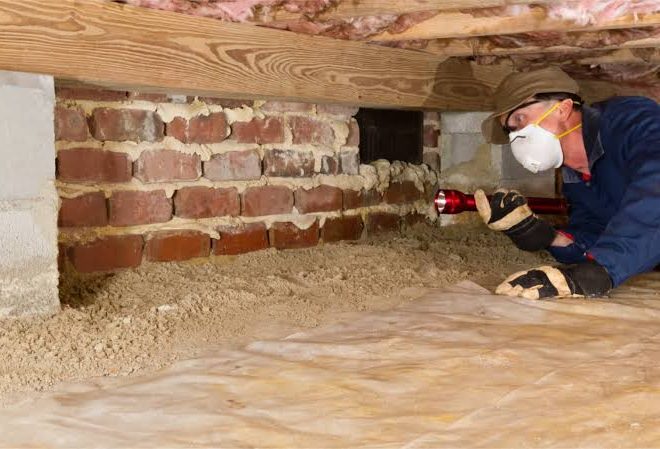
- Inspect after a rain, then map the moisture sources. Enter the crawl space within 24 hours of rainfall and note standing water, damp soil, efflorescence on masonry, rusted metal, dripping pipes, or wet insulation. Measure relative humidity if you can; above about 60% for long periods is a warning sign. Verify whether moisture appears at one wall, under plumbing, or across the entire floor. A problem sign is moisture concentrated near one corner or wall, which usually means outside drainage or a leak needs attention before encapsulation.
- Fix obvious bulk-water problems first. Extend downspouts at least 6 feet away from the foundation if local conditions allow, and make sure the yard slopes away from the house. Regrade low spots that hold water against the foundation. Verify that water is not discharging onto the same side of the house where the crawl space is wet. A problem sign is water pooling near foundation walls after runoff; encapsulation will not overcome that pressure.
- Remove standing water and debris. Pump or wet-vac water out, then clear organic debris, old vapor barrier scraps, and insulation that has fallen onto the ground. Let the space dry as much as the weather allows before sealing. Verify that the dirt floor is not muddy enough to deform underfoot. A problem sign is persistent seepage from the soil or wall after pumping, which suggests a drainage or groundwater issue.
- Seal penetrations and major air leaks. Use compatible sealant, foam, or mastic around plumbing penetrations, wiring holes, and gaps at the rim joist. Treat the rim joist carefully; it is often a major leakage path. If the rim area is compromised, consult a professional before sealing it. Verify that you have sealed visible openings without blocking required combustion air or covering unsafe electrical conditions. A problem sign is hidden deterioration, wet insulation, or electrical components too close to the work area.
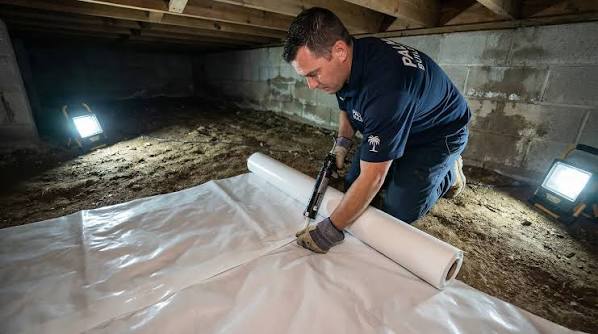
- Install the ground vapor retarder. Use a membrane commonly 10 to 20 mil thick for a durable crawl space application, and extend it over the entire soil surface. Overlap seams by at least 6 inches, and seal them with the manufacturer’s tape or mastic. Run the liner up foundation walls and around piers several inches so soil moisture cannot bypass the edges. Verify that the membrane lies flat without gaps, channels, or exposed soil. A problem sign is torn plastic, unsealed seams, or open edges at piers and walls.
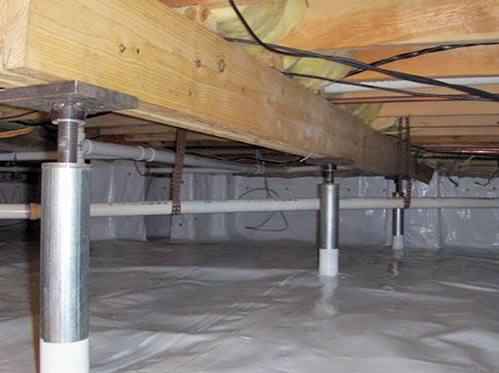
- Detail the edges and piers. Fasten the membrane to the wall with compatible mechanical fasteners or termination strips where appropriate, and seal around each pier or support with careful cuts and patches. Verify that piers are wrapped or sealed without leaving gaps that vent soil moisture into the space. A problem sign is a liner that stops short of vertical surfaces or leaves pier bases exposed.
- Address vents and insulation strategy. In a fully encapsulated crawl space, vents are typically sealed, not left open. Insulation is often moved from the floor joists to the crawl space walls, depending on climate and local code. Verify that the crawl space is now part of the conditioned envelope or at least isolated from outdoor air. A problem sign is vent grilles still open to humid outdoor air while the liner is installed below.
- Install humidity control and monitor it. Use a dehumidifier sized for the crawl space or a conditioned-air strategy appropriate to the home, and set a target that keeps the space dry enough to prevent mold and condensation. Place a hygrometer in the crawl space and check it over several weeks. Verify that humidity stays stable after rain and during humid weather. A problem sign is humidity climbing again even though the liner is intact, which means moisture is still entering or the dehumidification strategy is too weak.
A few details matter here. Seams are not a place to be casual; a 3-inch tape overlap is common in light-duty work, but I prefer more generous overlap where the space will be serviced later. Around piers and corners, cuts should be deliberate and patched. Any torn membrane should be repaired with the same system, not a random patch. If the crawl space includes a sump, discharge lines should be confirmed to drain away from the house and not backflow during storms. For product selection and installation details, check manufacturer documentation and crawl space guidance from building-science sources such as DOE and the Building America program DOE, ICC.
What marks a bad job is plain to see: wrinkles everywhere, exposed dirt at edges, vents left open, no dehumidification, and no plan for recurring water. A crawl space like that may look finished from the hatch, but the moisture problem is still alive.
How do I know if a crawl space needs encapsulation?
You know a crawl space needs encapsulation when moisture is recurring, not accidental, and when the space shows signs of vapor-driven humidity rather than only a one-time leak. If the crawl space smells earthy or musty, if insulation keeps dropping, if condensation appears on ducts or cold-water pipes, or if the relative humidity stays high for days after rain, encapsulation is worth serious consideration.
I would use a simple check before deciding: inspect during dry weather and again after a storm. If the space is dry in one season and damp in another, the problem may be seasonal outdoor air infiltration, which encapsulation can help solve. If the floor is damp all the time, the soil itself is probably feeding the moisture load and the liner becomes more important. If moisture appears in one spot only, such as under a sink drain, by a shower trap, or below an HVAC condensate line, fix the leak first. Encapsulation is not a substitute for plumbing repair.
A crawl space that is vented by design but located in a humid climate is often a candidate for encapsulation. Still, I would not blame vents in every house. In some drier regions or in specific seasonal conditions, venting can help. The wrong move is to copy a generic approach without looking at climate and water sources. A crawl space in coastal South Carolina is not the same problem as one in a dry mountain region or a cold northern foundation.
If you want a measurable trigger, think in terms of moisture behavior rather than a single number. A hygrometer that repeatedly reads high for long stretches, visible condensation, wet insulation, or mold growth are stronger indicators than a one-time damp day. The American Society of Home Inspectors and building-science resources from the U.S. Department of Energy discuss crawl space moisture control in terms of moisture sources, air sealing, and vapor control, not just ventilation. That is the right frame, and it aligns with crawl space moisture & encapsulation basics — complete guide recommendations from DOE and EPA sources DOE, EPA.
Encapsulation is usually the right answer when the crawl space is part of the home’s moisture load. It is the wrong answer when the crawl space is merely a symptom of a bigger defect, such as failed grading, groundwater intrusion, or a plumbing leak.
When should you stop and call in help?
Stop when the crawl space shows signs of water pressure, structural damage, or unsafe access. Encapsulation is not the fix for those problems.
Standing water returns within 24 hours of pumping: the site likely has ongoing groundwater entry or a drainage failure — get drainage evaluation before sealing anything.
Joists, sill plates, or subfloor show rot or sagging: the framing may already be damaged — have the structure assessed before adding a liner or insulation.
There is visible mold growth across wood or insulation: the moisture problem has been active long enough to support biological growth — fix the source and consider remediation, not just encapsulation.
Electrical wiring, junction boxes, or equipment are hanging low in the crawl space: sealing and working around energized components is unsafe — have the layout corrected before work continues.
The crawl space contains a furnace, water heater, or other combustion appliance that depends on crawl space air: changing the crawl space envelope can affect combustion air and venting — this needs a qualified evaluation before sealing vents.
Radon is known or suspected in your area and the crawl space is open to soil: a vapor barrier may help, but radon control may require a dedicated mitigation strategy — coordinate the encapsulation with that plan.
The crawl space height is too low for safe work or there is no reliable access: the project becomes a confined, awkward job with a high chance of sloppy installation — use a qualified crew or change the scope.
Groundwater rises after storms or snowmelt: encapsulation alone will not defeat hydrostatic pressure — install proper drainage and possibly a sump system first.
In every one of those cases, pushing ahead creates a sealed crawl space around an unresolved hazard. That is how people spend money twice. Better to identify the active problem and fix it in the right order. If conditions are severe, consult a professional who can assess the crawl space moisture & encapsulation basics — complete guide issues alongside drainage, structural, and indoor-air risks.
The mistakes people make most often, and what those mistakes cost
The most common mistake is treating a vapor barrier like a full encapsulation system. A sheet on the dirt floor can reduce evaporation, but if the edges are loose, vents are open, and moisture keeps entering from outside, the crawl space still behaves like a damp outdoor cavity. The cost is simple: the house may smell better for a while, but humidity problems return. The better route is to seal seams, edges, and air leaks, then control humidity.
A second mistake is skipping drainage work because the liner looks good from the hatch. If gutters discharge beside the foundation or grading holds water against the wall, the crawl space keeps getting water after rain. The result is trapped moisture and possible fungal growth under a shiny new membrane. The fix comes first: surface water, then encapsulation.
A third mistake is leaving vents open after installing the liner. In many climates, that defeats the whole point because humid outdoor air keeps entering. And then the space stays wet. Plain and simple.