Crawl Space Vapor Barrier: What It Does and When You Need One
Last updated: September 10, 2026
Key Takeaways
- A hygrometer reading above roughly 60% relative humidity in the crawl space is a warning sign, though the number alone does not tell the whole story.
- Measure relative humidity with a hygrometer and note whether it stays above about 60%.
- Tears in the first 2 feet of access paths are a common failure point.
- Check the finished space after rain and again after 30 days.
Table of Contents
- Who this applies to, and what you need to know first
- What a crawl space vapor barrier actually does
- Do I need a crawl space vapor barrier?
- How do you install a crawl space vapor barrier?
- What are the mistakes that make a vapor barrier fail?
- When should you stop and choose a different approach?
- How do you know the job was done well?
- FAQ
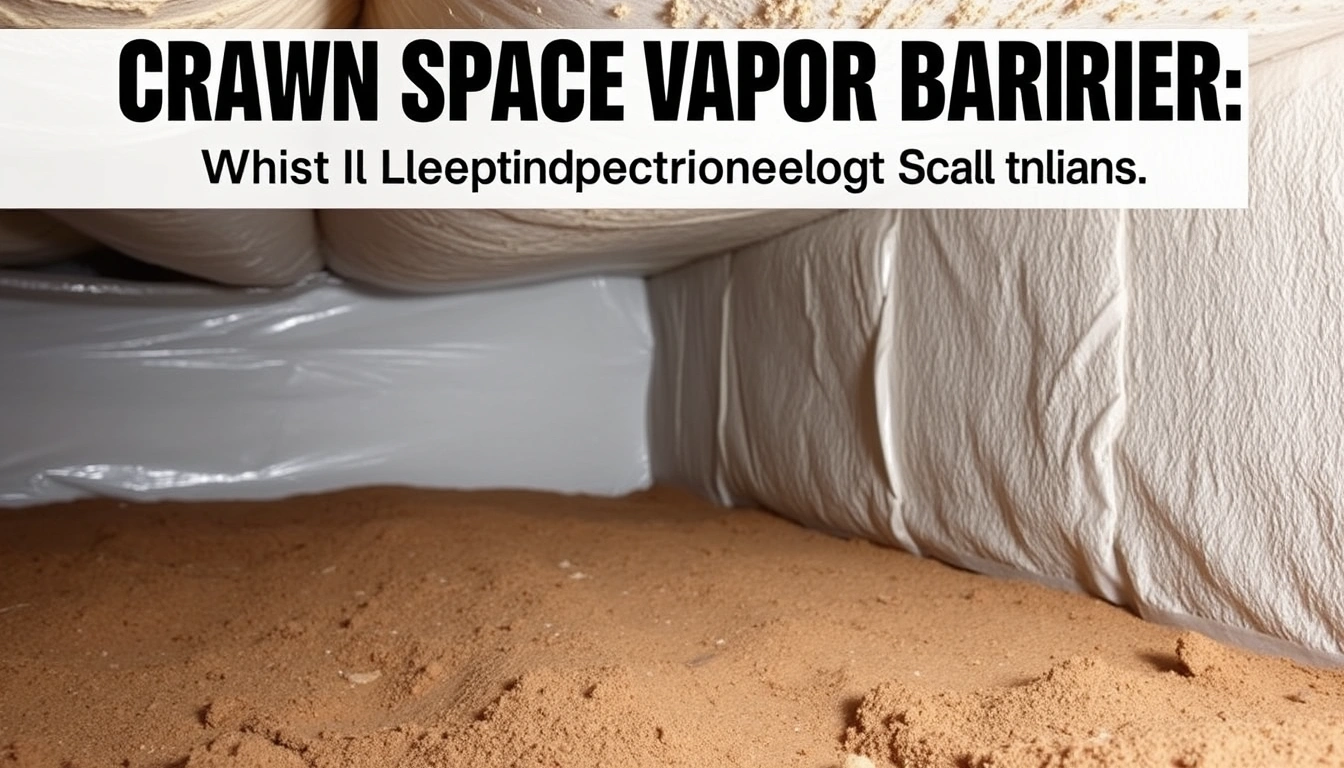
A musty crawl space usually points straight at moisture, and that smell is not subtle. If the dirt is damp, or humidity is bleeding up into the house, a crawl space vapor barrier: what it does and when you need one is often the first thing I’d inspect. One job. That’s it. It keeps ground moisture from evaporating into the crawl space air, where it can push indoor humidity up, feed mold, and wear down wood and insulation.
Who this applies to, and what you need to know first
Homes with a crawl space are the main fit here, especially unconditioned ones with exposed dirt floors, open vents, or obvious condensation on framing, ductwork, or pipes. A vapor barrier is a sheet of plastic, usually polyethylene, placed over the crawl space floor and sometimes turned up the foundation walls to slow moisture movement from the ground. Here, I’m talking about a moisture-control layer, not a full basement waterproofing setup.
You do not need one just because there is a crawl space. A dry space on a well-drained lot may need little more than ground cover and a few spot repairs. But when bare earth, standing water after rain, damp insulation, a moldy smell, rust on metal parts, or humidity that stays high for long stretches show up, the case gets stronger fast. A hygrometer reading above roughly 60% relative humidity in the crawl space is a warning sign, though the number alone does not tell the whole story, and the EPA notes that indoor moisture problems often need more than one fix. EPA Mold Course Chapter 2
This article assumes the crawl space is reachable and that any standing water has a cause worth tracking down. Active flooding? Severe rot? Sagging floors? Electrical hazards? Then this is not a “throw plastic on it and call it good” situation. A vapor barrier will not repair bulk water intrusion, failed grading, or broken plumbing. In those cases, the water source comes first, and the crawl space encapsulation plan should be reviewed with a professional.
What a crawl space vapor barrier actually does
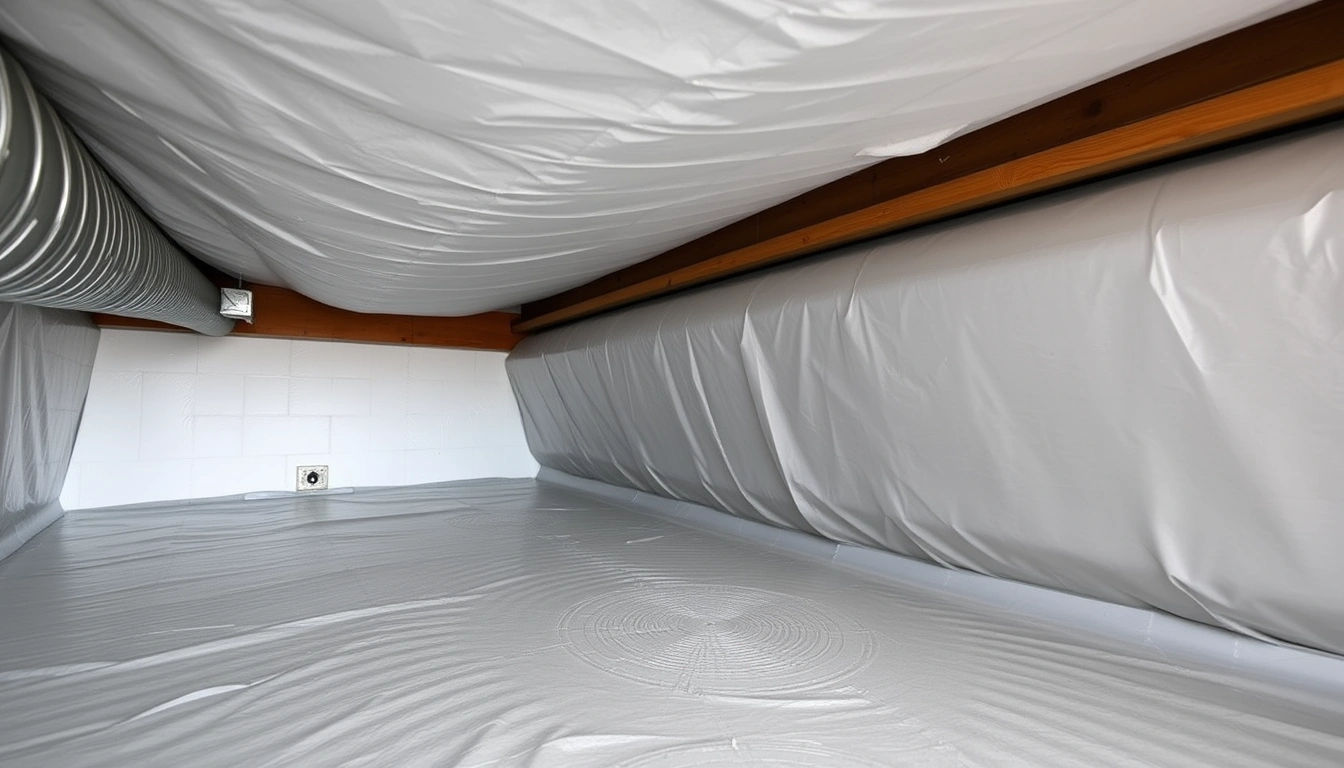
Ground moisture evaporates, and a crawl space vapor barrier slows that process by cutting off one of the biggest sources of water vapor. Small detail? Not really. In rainy stretches or humid climates, soil keeps feeding dampness into the space even when nothing is visibly pooling. Plastic on the floor also helps cut musty smells, shields insulation from repeated wetting, and slows corrosion on ducts, fasteners, and metal supports.
People sometimes treat the liner like a waterproof roof. It isn’t. Standard crawl space liners block vapor; they do not stop moving water under hydrostatic pressure, and the International Association of Certified Home Inspectors recommends handling drainage and water entry before relying on a liner. If groundwater is pushing through the soil, the fix may involve drainage, sump pumping, regrading, downspout extensions, or a sealed encapsulation system. Helpful, yes. Magic, no. So if water is still moving through the crawl space, bring in a qualified contractor or home inspector.
Detailing matters more than brand names. A flimsy sheet that tears, lies loose, or gets sliced around every pipe is basically decoration. A proper job overlaps seams, seals penetrations, and stays in contact with the ground where possible. In many installs, I’d expect at least 6-mil polyethylene as a bare minimum, while 10-mil, 12-mil, or heavier liners are often chosen for tougher conditions. Thickness helps, but it does not rescue sloppy work. Coverage and sealing do.
For homes with ductwork, HVAC equipment, or wood framing down there, the barrier can steady conditions enough that the other moisture problems become easier to manage. But if the crawl space is vented and the outdoor air is muggy, ground plastic by itself may still leave the space too damp.
Do I need a crawl space vapor barrier?
Probably, yes, if the crawl space has exposed soil and signs of recurring dampness, odor, or condensation. The clues are practical, not academic: wet dirt after an ordinary rain, insulation hanging limp or dark at the bottom, visible mold on joists, rust on HVAC components, or a house that feels sticky even when the thermostat looks fine.
I’d lean toward a barrier in these situations:
- The crawl space floor is bare earth.
- The crawl space stays damp after storms.
- Ducts or pipes sweat in warm weather.
- The home sits in a humid climate or on poorly drained soil.
- There is a known radon issue, because a barrier can be part of a radon-control strategy, though radon mitigation is a separate system and should follow local code and test results. EPA Radon
I’d be more cautious if the crawl space is bone-dry, already conditioned, or built with a foundation system that manages moisture another way. In those situations, a barrier can still help, but don’t install it blind. The wrong move can trap moisture where it causes more trouble than it solves. Honestly, that’s the booby trap here. A contractor should verify the crawl space design first.
A vapor barrier is not the first fix for every smell, either. If the odor comes from sewage, rodent activity, or a dead animal, plastic will not touch the source. If rainwater is coming in through a cracked wall or poor grading, fix the water path first. The barrier is a moisture-control layer, not a drainage substitute, and a local pro can confirm whether the crawl space needs repair before liner work.
How do you install a crawl space vapor barrier?
Cover the whole soil surface, seal the overlaps, and tie the liner into the crawl space perimeter so moisture cannot simply sneak around it. The order matters. Speed does not.
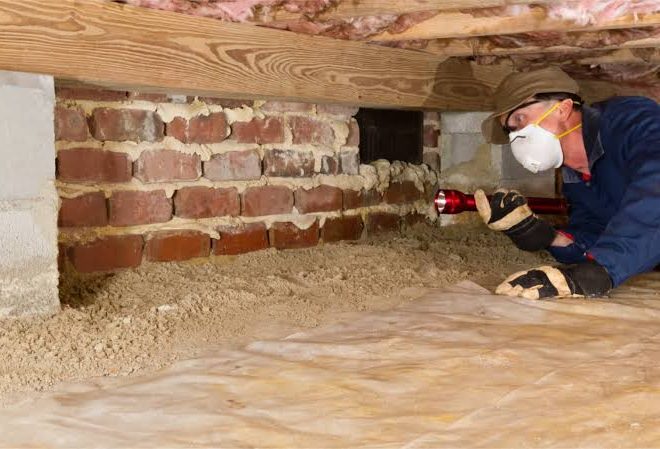
- Inspect the crawl space and map the moisture source. Look for standing water, wet foundation walls, plumbing leaks, open vents, fallen insulation, and punctures in the floor. Measure relative humidity with a hygrometer and note whether it stays above about 60%. If you see active water entry or rot, that is a problem to solve before covering the floor.
- Clear the floor and level sharp debris. Remove wood scraps, stones, broken concrete, and anything that can puncture plastic. A crawl space floor does not need to be garden-flat, but sharp edges do need to go. If the ground is so uneven that plastic bridges over voids and tears when stepped on, the prep is insufficient.
- Choose a liner thick enough for the job. For light-duty moisture control, 6-mil polyethylene is often the minimum; many professionals use 10-mil or heavier for better tear resistance. Verify that the material is rated for ground contact. If the sheet feels flimsy enough to snag on a fingernail, it is probably not enough for a rough crawl space.
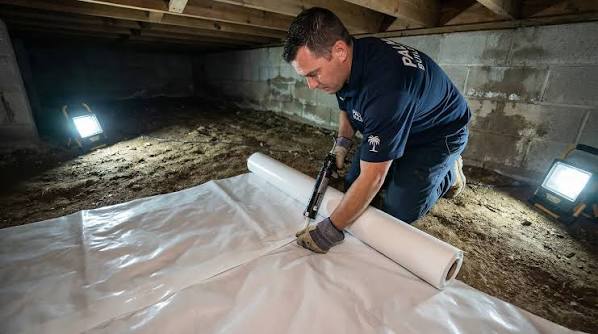
- Lay the barrier with generous overlap. Roll sheets out so they cover the entire floor and overlap seams by at least 12 inches, more if the space is irregular. The goal is continuous coverage. If you can see open soil between seams, the barrier is not complete.
- Seal seams and edges. Use vapor-barrier tape or the seam method specified by the liner system, then fasten or seal the perimeter to the foundation wall or piers as the design requires. Check that the seam stays flat and closed. If tape peels, dust or moisture is usually the cause.
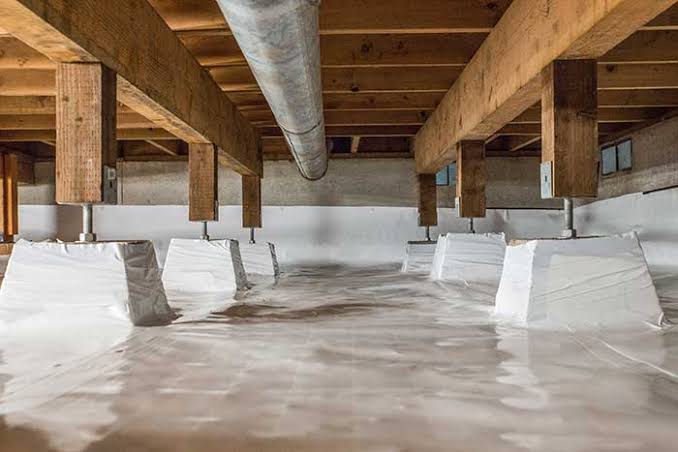
- Wrap piers, posts, and penetrations. Cut as little as possible around pipes and supports, then seal each penetration carefully. Every unsealed pipe is a shortcut for vapor. If the liner is cut into a dozen loose flaps, it will fail early.
- Protect the barrier at traffic points. If anyone needs to crawl through often, add walk boards or a heavier liner at those paths. Verify that knees, boots, and tools will not immediately wear holes through the sheet. Tears in the first 2 feet of access paths are a common failure point.
- Check the finished space after rain and again after 30 days. Look for pooled condensation, lifted seams, new odors, or damp spots at the edges. A good result is a dry, continuous sheet with no obvious gaps and a more stable humidity reading. If the crawl space still smells damp or the plastic is wet on the underside from groundwater, the barrier alone is not solving the problem.
That’s the basic routine. In an open crawl space, a patient DIYer can handle it if they can work in tight quarters and use a knife, tape, and measuring roll without creating more holes than they seal. If the space is very low, blocked up, or contaminated by mold, rodents, or asbestos-containing materials, that becomes a different kind of job.
What are the mistakes that make a vapor barrier fail?
The biggest mistake is laying down a thin sheet and pretending the job is finished. A torn 6-mil liner with open seams gives the appearance of progress but very little moisture control. The fix is simple in theory: pick the right thickness for the conditions and seal every seam with the proper tape or fastening system.
Another common slip is leaving the soil wet underneath. Standing water, a fresh plumbing leak, or groundwater coming through a wall crack can leave damp pockets under the liner and hide the real issue. First, correct drainage or plumbing. Then install the barrier. If the water keeps returning, a plumber or drainage contractor should verify the source.
A third mistake is slicing the liner around every pipe and pier without sealing the cuts. That creates dozens of vapor leaks. Better to lap, fold, and tape around penetrations so the barrier stays as continuous as possible.
A fourth error is stopping short of the walls and foundation edges. Vapor still enters at the perimeter if the liner only covers the middle of the floor. The better move is to run the barrier up the wall or foundation edge far enough to form a continuous moisture break, using the fastening method that fits the crawl space design.
A fifth mistake is pairing the barrier with the wrong ventilation strategy. In some crawl spaces, outside air vents add more humidity than they remove. In others, venting is part of the building design, and changing it without a plan causes trouble. So the safe route is to treat the crawl space as one system: ground cover, air sealing, drainage, and ventilation or dehumidification need to line up, and an HVAC or building-science professional can help match the parts.
When should you stop and choose a different approach?
You should stop and choose a different approach when the barrier would hide a larger problem or can’t be installed neatly enough to matter.
Standing water after ordinary rain: This means the crawl space has bulk water, not just vapor — fix grading, gutters, downspout extensions, or drainage before installing plastic.
Soft, sagging, or visibly rotted joists or subfloor: This means the structure may already be damaged — have the framing evaluated before sealing the crawl space, because moisture control will not restore lost strength.
Active plumbing leaks or condensate discharge: This means there is a direct water source — repair the leak first or the barrier becomes a wet trap.
Heavy mold growth or strong biological odor: This means moisture has already supported growth — cleaning and source control come before any liner work, and in serious cases the crawl space may need remediation.
Rodent infestation or contaminated insulation: This means the crawl space needs cleanup and sealing work first — a barrier alone will not make the space sanitary.
Very low clearance with tight obstructions: This means the work may be difficult to seal properly by hand — if you cannot reach seams and edges, the installation quality will be poor and the barrier will underperform.
If any of those are present, the barrier may still be part of the final solution, but it is not the first move. The wrong sequence wastes money and leaves the real problem in place.
How do you know the job was done well?
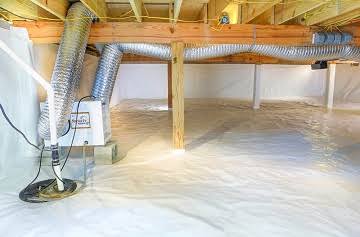
A good crawl space vapor barrier looks boring. That is the point. The floor is covered continuously, seams lie flat, edges are sealed, and the plastic does not float on pockets of wet air or hang in torn sheets. A decent result usually means the crawl space smells less earthy, humidity readings become steadier, and visible condensation on pipes or ducts becomes less common.
I’d want a few practical signs after installation. The liner should stay put after a week of normal foot traffic. Tape should not peel at the overlaps. There should be no exposed soil except at unavoidable access points. If the crawl space includes a dehumidifier, it should cycle less aggressively once ground moisture is controlled, though equipment runtime depends on climate and house leakage.
A bad job is easy to spot once you know the look: loose edges, cut-outs around every obstacle, puddles under the plastic, tape lifted by dust, and exposed dirt in the corners. If the liner only covers the center and stops 6 inches from the wall, the job is incomplete. If the crawl space still feels clammy after a few dry weeks, the barrier may be failing or the building may need more than ground cover.
One thing I would not oversell: a vapor barrier is not a guarantee that the crawl space will become dry enough on its own in every climate. In some homes, especially humid or vented ones, the barrier is step one, not the whole plan, and a crawl space encapsulation estimate may be the better next step.
FAQ
Can I install a crawl space vapor barrier myself? Yes, if the crawl space is accessible, dry enough to work in, and free of major structural or contamination problems. Tight spaces, standing water, and mold are the points where the job stops being a simple weekend task.
Is plastic sheeting from a hardware store enough? Sometimes for a light-duty temporary cover, but I would not treat thin general-purpose plastic as a proper crawl space barrier. Ground-contact liner with the right thickness and sealing method is the better choice, and a supplier or contractor can confirm the material before you buy it.
Does a vapor barrier stop mold? It helps prevent the moisture that mold needs, but it does not remove existing mold or fix leaks. You still need to control the water source and clean up any growth already there, ideally after a professional assessment if the problem is widespread. EPA mold cleanup guidance
Should the crawl space vents stay open? That depends on the crawl space design, climate, and moisture plan. Open vents can help in some dry conditions and hurt in humid ones. The barrier does not decide this by itself, so follow the house’s moisture strategy.
How long does a vapor barrier last? That depends on thickness, foot traffic, punctures, and moisture conditions. A well-installed liner lasts longer than a thin, loose one, but any barrier can fail if the crawl space keeps getting cut, flooded, or disturbed.