Encapsulated Crawl Space vs. Vented Crawl Space: Which Is Better?
Last updated: September 10, 2026
Key Takeaways
- Use polyethylene, commonly 10 mil to 20 mil in encapsulated systems, and overlap seams by about 12 inches.
- Inspect after the first heavy rain and again in 30 days.
- In an encapsulated crawl space, the vapor barrier, air sealing, and often a dehumidifier are the system.
- An encapsulated crawl space changes the physics.
For moisture control, indoor air quality, and comfort, encapsulated crawl space usually comes out ahead; vented crawl space only wins in a fairly narrow slice of dry, simple, well-detailed buildings. My default, honestly, would be to treat encapsulation as the stronger long-term fix unless your house sits in a climate and foundation setup where a sealed crawl space is a poor match. Short version. Go sealed, unless the site says otherwise.
Who this applies to — and what I’m assuming you already know
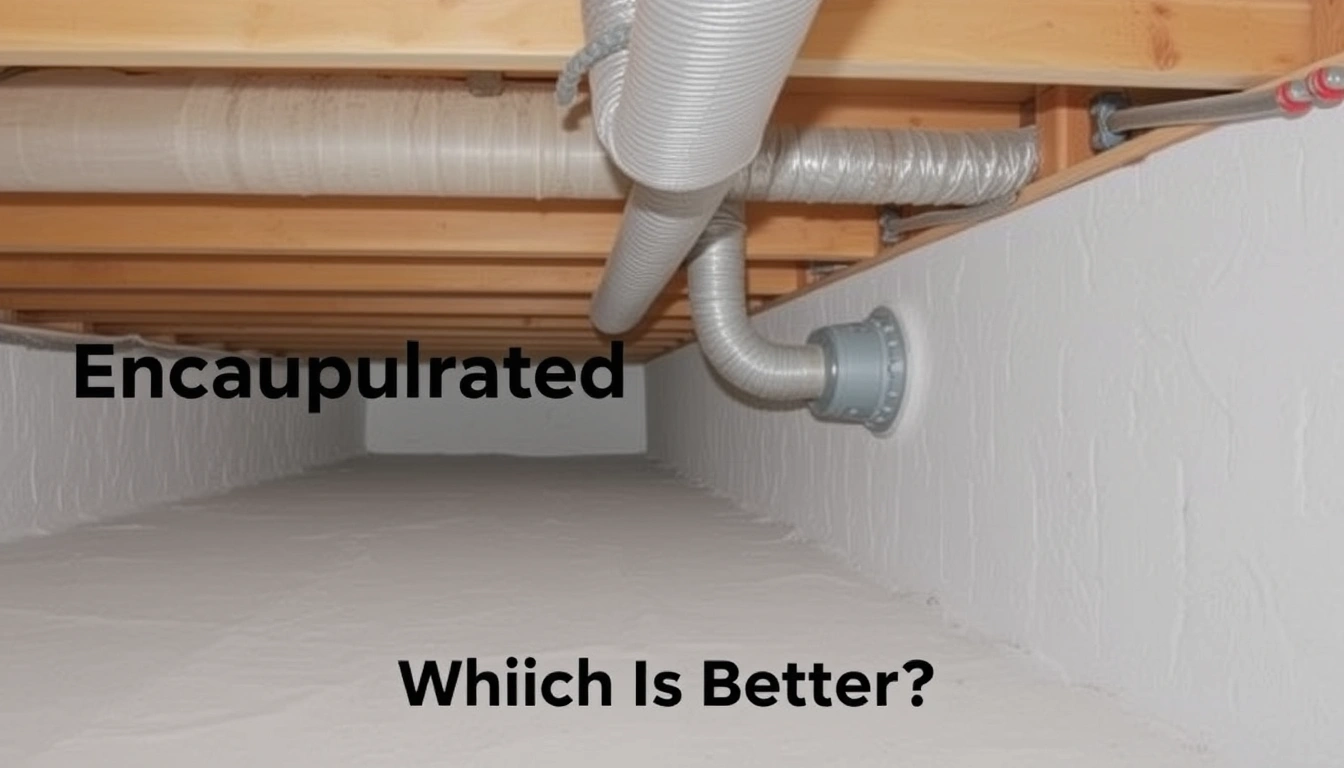
Homeowners are the main audience here, especially anyone deciding whether to keep a crawl space vented or convert it to an encapsulated crawl space. Buyers looking at a home with either setup fit too. I’m assuming you already know the crawl space is the shallow area under the floor framed by foundation walls, and that it may hold insulation, ducts, plumbing, or a furnace; the question is not “What is a crawl space?” but “Which strategy handles moisture and maintenance better?”
The short answer is straightforward: an encapsulated crawl space is a controlled space, with vents closed, the floor above separated from ground moisture, and the area usually lined with a vapor barrier sealed at seams and edges. A vented crawl space stays open to outdoor air through foundation vents and depends on outside conditions to dry the space. Simple on paper. Messier in real life. Outside air is often the problem, not the cure; if you are unsure, consult a qualified contractor, building scientist, or code official, because warm humid air entering a cooler crawl space can condense on framing, ducts, and joists, especially in spring and summer. EPA
I’m not treating every case as a specialist-only job, but a few situations do call for qualified help: standing water after rain, mold on framing, sagging floors, rotten sill plates, asbestos insulation, radon concerns, or HVAC equipment sitting in the crawl space. Those are not “pick a side and move on” problems. They change the repair, and the EPA and NIBS both stress moisture diagnostics before assembly changes. No shortcuts.
If your house is already dry, elevated, and built in a climate where foundation vents are part of the original design and still code-appropriate, a vented crawl space may be serviceable. But if the space smells earthy, the insulation is falling, or the wood feels damp in summer, the better question is not “Can I keep the vents?” It is “What is keeping moisture in?”
Encapsulated crawl space vs. vented crawl space: the real difference
Encapsulation wins when the goal is to control moisture instead of hoping outdoor air will do it. In a vented crawl space, the ventilation openings are the system. In an encapsulated crawl space, the vapor barrier, air sealing, and often a dehumidifier are the system. That difference matters because crawl spaces fail by moisture path, not by theory.
A vented crawl space tries to dilute humidity with outdoor air. In a hot-humid climate, that air often carries more moisture than the crawl space can safely hold. When it hits cooler wood, metal, or concrete, water condenses. Insulation batts can fall out of joist bays, and the underside of the floor can stay damp long enough for mold and wood decay to start. In a cold climate, vents can also chill plumbing and floor systems. I would not call the vented approach “wrong” everywhere, but I would call it fragile. Paper-thin luck. That’s the weak link.
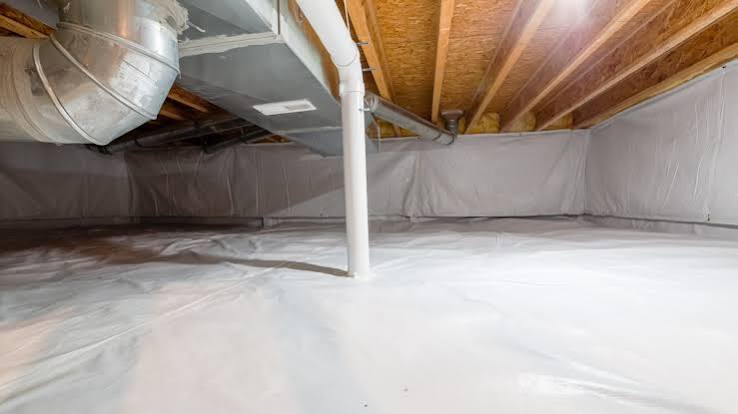
An encapsulated crawl space changes the physics. A heavy vapor barrier, usually 6 mil to 20 mil polyethylene depending on the assembly, is laid over the soil and sealed at overlaps, piers, and walls. Foundation vents are closed off. The crawl space becomes part of the conditioned envelope or a quasi-conditioned buffer zone. That does not mean it must be heated like a living room, but it does mean the space is isolated from outdoor air and ground vapor.
The trade-off is cost and detail. Encapsulation can be done badly. A loose sheet of plastic with open seams is not encapsulation; it is a tarp. A vented crawl space can also be done badly, but the failure mode is easier to predict: humid air, damp wood, and odors. If I had to choose the approach with fewer ways to lose, I would choose encapsulation.
This is also why “best” depends on the house. A pier-and-beam foundation with no plumbing, no ductwork, and very dry air is a different candidate than a ranch house in a Gulf Coast summer. The second house has a much stronger case for encapsulation, and if water enters, a sump pump may be part of the drainage plan; a dehumidifier set to keep relative humidity below a practical control range, commonly around 50% or lower in the crawl space, is also often used. I am avoiding a hard universal number because the right target can vary by climate and materials, but the principle stays the same: dry the assembly, not just the air. ENERGY STAR EPA radon
Which crawl space is better for moisture, air quality, and energy use?
Encapsulated is better for all three in most homes, but only if it is detailed correctly. Moisture control is the big one. Most crawl space problems begin with bulk water, soil vapor, or humid air entering through vents and open gaps. Encapsulation addresses all three by sealing the ground, closing vents, and making the crawl space easier to dry with mechanical control.
Air quality improves because crawl spaces are connected to the house more than people realize. Air moves through floor penetrations, plumbing chases, recessed framing, and stack effect. A vented crawl space can bring in musty air, insect debris, and sometimes combustion-related issues if appliances are present. A sealed crawl space reduces the amount of raw outside air moving under the house. That does not make the crawl space “clean” by itself, but it gives you a controllable environment.
Energy use is where people sometimes oversell the case. Encapsulation can help reduce heat loss and humid air infiltration, especially if ducts are in the crawl space. But I would not promise a dramatic utility bill drop. The real gain is more consistent indoor comfort, less strain on HVAC equipment, and fewer moisture-related repairs. If ducts run through a vented crawl space, they are sitting in a bad neighborhood. In a sealed crawl space, they are in a less hostile one.
There are cases where vented crawl spaces still make sense. A house in a consistently dry climate, with no plumbing risk, a high foundation, excellent drainage, and code-compliant venting may do fine. Some older buildings were designed with cross-ventilation in mind, and forcing an encapsulation without checking the drainage and grading first can trap water if the site is already collecting it. But I would treat those as exceptions, not the default. If you are unsure whether the site, climate, or code favors venting, consult a local building professional before changing the crawl space strategy. U.S. DOE IRC
One more distinction: encapsulation is not the same as “spray some foam and forget it.” The crawl space still needs drainage control, sealed ground coverage, insulated walls or rim joists as required by your climate zone, and a way to keep humidity from climbing. The American Society of Heating, Refrigerating and Air-Conditioning Engineers (ASHRAE) has guidance on moisture control in building assemblies, and local code officials often follow the IRC or state amendments when crawl spaces are converted. If you are unsure, the local code language matters more than internet arguments. ASHRAE IRC
How do you encapsulate a crawl space the right way?
Start with water. Then seal. Then dry. You encapsulate a crawl space by stopping bulk water first, sealing the ground and vents second, and then controlling indoor humidity third. The order matters because plastic over a wet floor is not a fix. A crawl space conversion that ignores drainage usually fails within one rainy season.
- Fix exterior water first. Regrade soil so it slopes away from the foundation at about 6 inches over the first 10 feet where possible, clean gutters, and extend downspouts at least 5 to 10 feet away. Verify that water no longer ponds along the foundation after rain. If the soil stays saturated or water still enters, the problem is not solved.
- Check for standing water and source leaks. Look for puddles, wet soil, dripping supply lines, or sewer seepage after a rain event and after plumbing use. Verify the source before covering anything. If water returns from below or through a wall, a vapor barrier alone will fail.
- Remove loose debris and damaged insulation. Take out trash and anything that blocks inspection. Aim for exposed framing and a clean soil surface. Verify that joists, sill plates, and piers can be inspected. If you leave debris in place, the barrier will not seal and pests will keep nesting.
- Install a ground vapor barrier. Use polyethylene, commonly 10 mil to 20 mil in encapsulated systems, and overlap seams by about 12 inches. Seal seams with compatible tape or mastic and run the barrier up the foundation wall and around piers. Verify continuous coverage with no exposed soil. If you can see dirt, moisture can still move.
- Seal vents and large openings. Close foundation vents, gaps around pipes, and openings to the outside with rigid material and sealant. Verify that outside air is no longer blowing through the crawl space. If there is still noticeable airflow, the envelope is leaky.
- Address rim joists and insulation. Insulate the rim joist with code-appropriate material for your climate, and ensure the assembly stays dry. Verify that insulation is firmly installed and not touching wet soil. If the insulation sags or gets damp, the assembly is wrong for the site.
- Provide humidity control. Install a crawl space dehumidifier sized for the space, or connect conditioned air only if local code and the equipment manual allow it. Verify that the crawl space holds a stable humidity level instead of swinging wildly. If humidity stays high, the dehumidification plan is undersized or the envelope is still leaking.
- Inspect after the first heavy rain and again in 30 days. Check seams, edges, piers, and low spots. Verify that the barrier stays tight, dry, and free of odor. If the plastic floats, wrinkles from water, or develops new musty smells, you have a water-management problem, not just an encapsulation problem.
A good result looks boring: dry plastic, no musty smell, no sweating ducts, no visible condensation, and accessible framing. That is the point. Encapsulation is not supposed to announce itself. It is supposed to remove the conditions that make a crawl space a problem.
What are the mistakes people actually make?
The biggest mistake is thinking vents alone solve moisture. They do not. In humid weather, vents often import the exact air you were trying to get rid of. The consequence is damp insulation, mold growth, and wood that stays wet longer than it should. The correct alternative is a sealed crawl space with real moisture control.
Another common misstep is skipping exterior drainage. If gutters dump water next to the foundation, no amount of polyethylene on the floor will save the assembly. The consequence is trapped water, compromised seams, and eventually rot or pest activity. The fix is to move water away from the house first, then encapsulate.
A third mistake is using thin plastic or leaving seams unsealed. A 6 mil sheet thrown on the ground is not enough for a crawl space that will be walked on for maintenance or exposed to minor puncture. The consequence is tears, vapor leaks, and a system that looks finished but behaves like a patchwork. The alternative is heavier material, proper overlaps, and tape or mastic designed for the job.
A fourth mistake is sealing the crawl space but forgetting humidity control. If the space is closed up and still receives moisture from the soil, leaks, or the house above, humidity can climb. The consequence is condensation on ducts and framing even with no vents. The correct alternative is a dehumidifier or another approved drying strategy.
A fifth mistake is encapsulating over wood that is already rotting or moldy without fixing the damaged parts. That hides the problem instead of solving it. The consequence is deferred failure and harder repairs later. The correct alternative is to repair damaged framing and confirm the structure is sound before sealing the assembly.
A sixth mistake is ignoring radon where it matters. In many parts of the United States, a sealed crawl space changes how soil gases are managed. The consequence is that you can improve moisture control while creating a gas-control issue if you do not address it. The correct alternative is to follow local radon guidance and test where radon is a known concern. EPA radon
When should you keep a vented crawl space?
You should keep a vented crawl space only when the site, climate, and building details make moisture entry low and the assembly already performs well. That is a narrow category. If the house is dry through summer and winter, the framing is sound, the site drains well, and the crawl space carries no HVAC equipment or moisture-sensitive finishes, venting may be adequate.
Standing water after storms: This means the crawl space is taking on bulk water, not just humidity — fix drainage and consider encapsulation with a drainage plan. If the water comes back after every rain, vents are not the issue; the site is.
Musty odor, darkened joists, or visible mold: This means moisture has been present long enough to affect the assembly — stop relying on ventilation and address the moisture source before closing the space. A vented crawl space is often the wrong tool here.
HVAC ducts or air handlers in the crawl space: This means the mechanical system is sitting in a harsh environment — encapsulation is usually the better path, because ducts in a vented crawl space lose efficiency and pick up humidity. Leaving them exposed often costs more than sealing the space.
Evidence of pest activity or open soil: This means the crawl space is acting like an entry route and habitat — seal the floor and perimeter rather than continuing to ventilate it. Vents can make pest control harder, not easier.
Asbestos, major structural damage, or unknown materials: This means the project is not a simple moisture upgrade — pause and get qualified help before disturbing insulation or old piping. Encapsulation is not the first step when hidden hazards are present.
If the crawl space is dry, simple,