How to Stop Groundwater from Getting Into a Crawl Space
Last updated: September 10, 2026
Key Takeaways
- Aim for at least a 6-inch drop over the first 10 feet where site conditions allow.
- Overlap seams by 6 to 12 inches and seal them with the correct tape or mastic.
- A sump that dumps 3 feet from the foundation simply sends water back to the same place.
- Extend downspouts at least 6 to 10 feet from the foundation, and make sure gutters are not overflowing at corners or elbows.
Table of Contents
- Key Takeaways
- Who this applies to — and who should do something else
- Why groundwater gets into a crawl space
- How do I stop groundwater from getting into a crawl space?
- What should I check before I start digging?
- When should I stop and call in help?
- The mistakes people make, and what those mistakes cost
- What changes in a high-water-table yard or a sealed crawl space?
A wet crawl space is usually not a mystery. It is a chain reaction.
If you are trying to stop groundwater from getting into a crawl space, the fix is usually a mix of drainage, grading, and sealing—not one magic product. The answer changes depending on whether water is coming through the soil under the crawl space, at the foundation wall, or through a damaged drain or sump system; still, the sequence for how to stop groundwater from getting into a crawl space stays the same: move water away, relieve pressure, then seal.
Who this applies to — and who should do something else
This is for a homeowner or property manager dealing with a damp, musty, or actively wet crawl space where the water source is below grade and seems tied to rain, snowmelt, or a high water table. In plain English, this guide is for how to stop groundwater from getting into a crawl space when the space is not merely humid; the clues are standing water, mud, efflorescence on masonry, wet insulation, or a vapor barrier that is soaked or displaced. A concrete-slab crawl space is not the same as bare earth. Different details. Same logic.
The goal is simple: keep water from collecting under or against the foundation, then give whatever still shows up a way out. Start outside, then add interior collection if needed. Plenty of people try to seal the inside first. Bad bet. Hydrostatic pressure—the sideways push of water in saturated soil—keeps forcing moisture through joints, cracks, and porous block. EPA guidance on moisture control and the Building America Solution Center both stress fixing the source before relying on interior materials. EPA PNNL
I would not treat this like a cosmetic repair if you see bowed walls, a cracked footing, a sagging beam, or recurring water after moderate rain. Those are signs the crawl space is part of a larger foundation or drainage issue, and a structural contractor or drainage specialist should inspect it. If there is sewage, a suspected line break, or mold covering a large area, this is not a simple DIY moisture job either. The APA and ICC guidance both treat foundation movement and persistent wetting as conditions that warrant professional evaluation. APA ICC
The right mindset is not “How do I dry the floor once?” It is “What is letting water collect here, and how do I break that path?” That usually takes a 1-day to 3-day effort for basic drainage corrections, or a longer project if a sump, liner, or discharge line is involved. For how to stop groundwater from getting into a crawl space, the practical timeline is often one weekend for downspouts and grading, then extra time for drainage hardware.
Why groundwater gets into a crawl space
Groundwater gets into a crawl space because the soil around the foundation becomes saturated and the water looks for a lower-pressure path. The crawl space sits at the low end of that path. Two routes show up most often: through the soil under the crawl space and through the foundation walls where pressure finds cracks, mortar joints, the seam at the wall-footing junction, or unsealed penetrations for plumbing and wiring.
Hydrostatic pressure is the term I use most. That means water in saturated soil is pushing against the foundation from outside. If the grade slopes toward the house, downspouts dump near the footing, or gutters overflow, the pressure climbs fast. Clay soil makes the issue stubborn because it holds water longer than sandy soil. Sand drains better, yes—but if there is a high water table, even sandy soil can keep a crawl space wet. FEMA’s foundation and drainage guidance also emphasizes moving water away from the wall before it reaches the footing. FEMA
A generic article usually stops at “add a vapor barrier.” Not enough. A vapor barrier slows moisture coming from the soil surface; it does not stop liquid water moving through the ground. If you have standing water after a storm, drainage comes first, and the Building America crawl space guide recommends drainage and air sealing as part of a complete system. PNNL
Condensation is a different animal. Warm, moist air hits cool surfaces. Groundwater leaves tide marks, wet soil, mud, or actual puddles. If the crawl space is wet mostly in summer and the soil is dry, condensation may be the main problem. If it is wet after rain or snowmelt, groundwater or runoff is the likely source. Simple, but not always obvious.
Because of that, the path matters more than the product. Water on the floor points to under-slab seepage. Water on one wall points to a local grade or gutter issue. Water at many points usually means the whole site is holding water around the foundation.
How do I stop groundwater from getting into a crawl space?
You stop groundwater from getting into a crawl space by changing how water moves around the house: send surface water away, relieve pressure at the foundation, collect any remaining seepage, and seal the crawl space floor and walls only after drainage is under control.
Here is the sequence I would follow.
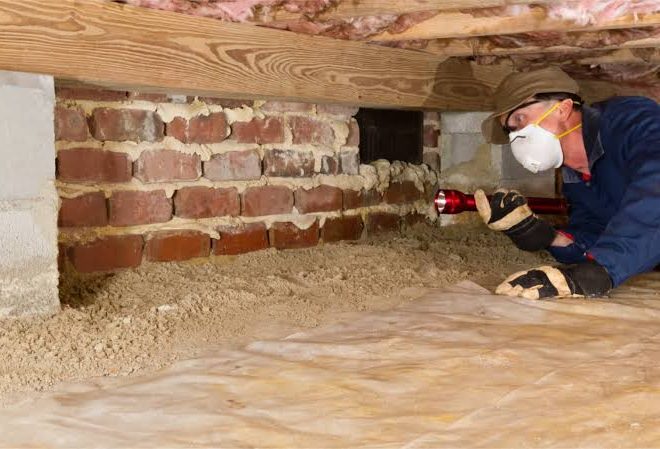
- Map the source during or right after a wet period. Look for the highest wet line, puddles, mud trails, white mineral deposits, and where water first appears. Measure the crawl space clearance and note whether water is on the soil, on masonry, or coming from a joint. Check whether the problem shows up after rain, snowmelt, or irrigation. Dry-weather seepage at the same spot every day? That may be plumbing, not groundwater. For how to stop groundwater from getting into a crawl space, this source check keeps you from treating the wrong problem. crawl space moisture control
- Fix exterior roof drainage first. Extend downspouts at least 6 to 10 feet from the foundation, and make sure gutters are not overflowing at corners or elbows. Check that water lands on a slope carrying it away from the house, not into a low spot. If the soil directly below the downspout is eroded or the splash block is buried, the drainage path is failing. downspout extension guide
- Regrade the soil so it falls away from the house. Aim for at least a 6-inch drop over the first 10 feet where site conditions allow. Use compacted soil, not loose fill. Make sure no new low spot traps water against the foundation. If regrading would bury siding, vents, or exterior trim, stop and redesign that area instead of piling soil higher.
- Keep surface water out of window wells, stairwells, and low entries. Add or repair covers, drains, and extension lines so runoff does not collect against the wall. Check that the lowest point has a path to daylight or a drain. If a window well fills during rain, that well is part of the problem and can overwhelm everything else you do inside. window well drainage
- Install an interior perimeter drain if seepage continues. A perimeter drain, often called a French drain, is a perforated pipe in washed stone that intercepts water before it pools. Place it along the inside edge of the footing and slope it to a sump basin. Check that the pipe has a consistent fall, usually around 1/8 inch per foot where possible, and that the stone bed is clean and free-draining. If the pipe is flat, crushed, or daylighting nowhere, it will not collect water reliably. Interior perimeter drains are one of the standard answers for how to stop groundwater from getting into a crawl space when outside fixes are not enough. French drain vs. sump pump
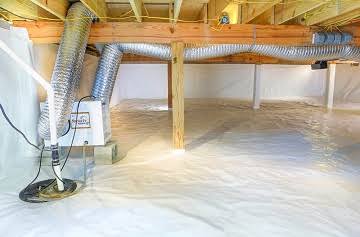
- Add a sump basin and pump where gravity cannot carry water out. Put the basin at the low point of the crawl space, typically where seepage is most persistent. Size the basin and discharge line for the expected flow, and route discharge well away from the foundation with a freeze-resistant outlet if you are in a cold climate. Check that the pump cycles on and off cleanly and that the discharge is not backing up. If the basin fills but the pump cannot keep up, the system is undersized or the inflow is too heavy for that setup. A properly placed sump is often the last step in how to stop groundwater from getting into a crawl space on flat lots. sump pump installation
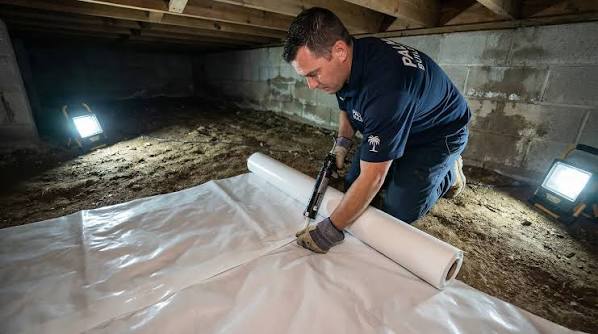
- Seal the crawl space floor with a continuous vapor barrier after drainage is working. Use at least a 6-mil poly barrier for basic moisture control; in a serious wet crawl space, I would prefer a thicker reinforced liner if the budget allows. Overlap seams by 6 to 12 inches and seal them with the correct tape or mastic. Extend the barrier up the wall several inches and fasten it mechanically where appropriate. Check that the liner lies flat, covers all exposed soil, and is not full of holes. If water is still pooling under the liner, you have trapped moisture, not solved it. This is part of how to stop groundwater from getting into a crawl space, but only after drainage is doing its job.
- Seal obvious wall and penetration leaks only after pressure is reduced. Use hydraulic cement for small, active leaks in masonry joints or around pipes, and use compatible sealants for penetrations. Check that the leak slows or stops under wet conditions. If water is forcing through multiple cracks or a wall is moving, patching individual spots is only a temporary bandage.
The order matters. People who start with paint-on coatings or basement sealer products usually end up with peeling film and the same wet crawl space. Water needs a path away from the foundation before you can expect sealing to hold. That is the core of how to stop groundwater from getting into a crawl space.
What should I check before I start digging?
Check whether the water is really groundwater, whether the site can be regraded without creating new problems, and whether the foundation shows signs of movement. A 30-minute inspection can save a 3-day rework.
First, look at the lot after a hard rain. If water is ponding beside the house, or if a neighbor’s slope sheds water toward your property, exterior drainage is the first priority. Check downspout outlets, driveway edges, patio drains, and any low swale that might route water toward the crawl space.
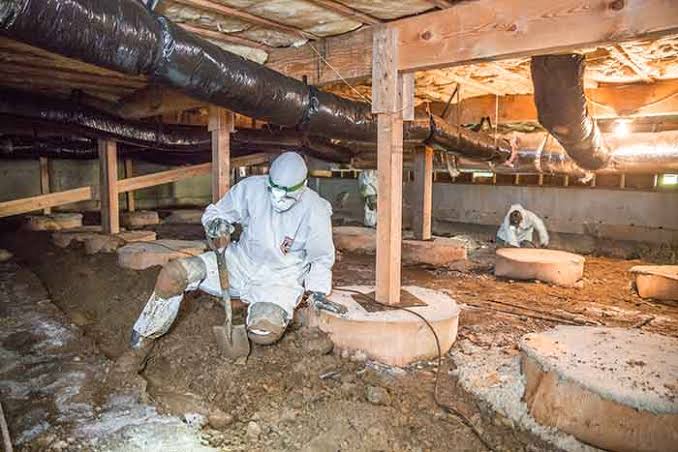
Second, look inside for clues that tell you how aggressive the fix needs to be. Efflorescence on block walls means moisture has been moving through the masonry. Rusted metal posts, mold on joists, and rotted sill plates tell me the crawl space has been wet long enough to damage materials. A visible crack wider than a hairline, a wall that leans, or a beam that sags are not moisture-only issues.
Third, consider what kind of crawl space you have. A vented crawl space with bare soil behaves differently from a sealed one with a liner and conditioned air. If the crawl space is vented, humid outside air can make the space wetter in summer even after you improve drainage. If it is already sealed, the liner and seals may need repair rather than replacement.
Fourth, check for a natural discharge option. Sometimes a drain line can run to daylight downhill from the foundation. In many flat yards, it cannot, which is why a sump is needed. If you already have a sump pit, check whether the pump has a check valve, whether the discharge is frozen in winter, and whether the outlet dumps too close to the house.
I would not proceed with excavation if you see utilities, unstable soil, or a retaining wall near the work area without confirming what is there first. Hitting a gas line or undermining a footing turns a moisture project into a repair bill fast. Ugly outcome. No bargain there.
When should I stop and call in help?
Stop and bring in qualified help when the problem is bigger than drainage, when the foundation is moving, or when the fix would require structural work you should not improvise. Here are the clearest lines I use.
Foundation wall is bowed, cracked in a stair-step pattern, or moving: This means soil pressure may be deforming the wall — get a foundation contractor or structural engineer involved before adding drains or sealers.
Water is entering through a footing joint or multiple wall cracks during moderate rain: This often means the pressure load is high and widespread — an interior drain and sump may still help, but the system should be designed by someone who works with crawl space water management regularly.
Standing water returns within 24 to 48 hours after pumping or bailing: This means the inflow rate is not trivial — do not rely on spot sealing; consider a full perimeter system and confirm where discharge can go.
The crawl space has mold on more than a small area of framing or insulation: This means the moisture problem has already become a material-condition problem — fix the water first, then address contaminated insulation or wood with proper remediation.
You suspect a plumbing leak, septic issue, or sewage backup: This is not groundwater until proven otherwise — shut off water if needed, isolate the source, and use the correct tradesperson rather than a moisture fix.
The floor is soft, the footing is exposed, or excavation would cut into unstable soil: This means digging could undermine support — stop and have the site evaluated before any trenching.
For an ordinary crawl space moisture problem, many homeowners can handle downspout extensions, regrading, and installing a vapor barrier. Once you are cutting concrete, trenching inside a foundation line, or dealing with a pump system tied into electrical service, the job gets less forgiving.
The mistakes people make, and what those mistakes cost
The most common mistake is sealing the crawl space before solving drainage. That traps water in the soil and can make the crawl space feel wetter, not drier. Move roof runoff, surface runoff, and seepage away first. Then seal.
A second mistake is using a thin plastic sheet and calling it a vapor barrier. Loose, torn poly does little if seams are open or the edges are not sealed. A continuous liner with overlapped and taped seams, anchored at the perimeter, is the better path.
A third mistake is putting the sump basin in the wrong spot or making it too small. If the pit is not at the low point, water keeps pooling elsewhere. If the pump cannot keep up with inflow, it cycles constantly or fails during heavy rain. Put the basin where water naturally collects, and size the pump and discharge correctly. That math stops working fast.
A fourth mistake is raising soil too high against the foundation to “solve” drainage. That can bury vents, invite termites in some regions, and hold moisture against the wall. Regrade with a fall away from the house, not a berm against it.
A fifth mistake is ignoring the discharge line. A sump that dumps 3 feet from the foundation simply sends water back to the same place. Carry it farther out. Prevent freezing. Prevent backflow too.
A sixth mistake is treating every wet crawl space as a ventilation problem. Venting can help in some climates and hurt in others, especially when warm humid air hits a cool crawl space. If groundwater is the source, more vents will not solve it, and a crawl space moisture professional or foundation specialist should confirm the cause before you change the venting.
What changes in a high-water-table yard or a sealed crawl space?
The standard fix needs adjustment when the yard stays saturated, the water table is high, or the crawl space has already been encapsulated. In a high-water-table setting, exterior regrading and downspout work may reduce runoff but not lower groundwater enough. Then the perimeter drain and sump become the real control point.
If the crawl space is already sealed, I would check the liner seams, wall transitions, and sump lid before assuming the drainage failed. A damaged liner can let vapor back in and can hide seepage paths. Repairing the liner may be enough if the water problem was minor and the drainage path is still intact. Under a sealed crawl space, the little things matter.