Crawl Space Repair Symptoms & Diagnosis: The Complete Guide
Last updated: September 10, 2026
Key Takeaways
- Walk the perimeter after a normal rain or within 24 hours of one.
- The same symptom can mean one thing in a 1950s pier-and-beam section and something else in a newer addition on concrete footings.
- In a vented crawl space, warm humid air can condense on cooler framing, ductwork, and subflooring.
- In an unsealed crawl space, water vapor can rise from exposed soil.
Table of Contents

- Who this guide is for — and who should not treat this as a DIY problem
- What crawl space repair symptoms usually point to
- How do I tell if the crawl space is causing the problem?
- Crawl space repair diagnosis: the step-by-step inspection order
- What the signs mean when you see them together
- When should you stop guessing and call for qualified help?
- Common crawl space repair mistakes, and what they cost
- What changes the diagnosis in older homes, additions, and mixed crawl spaces?
Sagging floors. A musty house. Damp insulation under the floor. Those are often the first crawl space repair symptoms that tell you something below the house is out of sync. This crawl space repair symptoms & diagnosis — complete guide lays out how to read the clues, what they tend to mean, and where the line is between a small fix and a bigger issue; for your own situation, speak with a qualified home inspector, structural professional, or licensed contractor before you decide on a fix.
Who this guide is for — and who should not treat this as a DIY problem
Homeowners, buyers, and tenants are the people this is for — anyone who has noticed one or more crawl space repair symptoms and wants to sort out whether the culprit looks like moisture, ventilation, pests, structural movement, or damaged insulation. You need to be able to look safely into a crawl space, spot the obvious warnings, and compare what is below with what is happening in the rooms above. And no, this is not about diagnosing a body from a house smell. If you or someone in the home has asthma, a persistent cough, or another health concern, talk with a qualified professional about the indoor air issue as well as the building issue. The EPA advises that if you can see mold or smell musty odors, you should address the moisture source and, for health concerns, consult a health professional or qualified remediation professional as appropriate.
One thing I’d separate right away is “probably manageable” from “do not improvise.” A crawl space with a little condensation on ductwork after a humid day is not the same animal as one with standing water, clearly rotten joists, or a floor that feels soft underfoot. Big difference. A crawl space is not always a place where the safest answer is a dehumidifier or a roll of plastic. Sometimes the symptoms point to a drainage problem outside the house, a plumbing leak inside the cavity, or structural movement that needs a building professional.
I would not treat this as a cosmetic issue if you notice any of these: a strong earthy odor that comes back after the house is aired out, rust on HVAC parts, repeated mold growth on stored items, or doors and windows upstairs sticking in the same area of the home. Those signs can overlap, and the overlap is the clue. Mold, rot, and settlement often show up together because moisture changes wood, soil, and metal at the same time. The CDC says mold is a moisture problem first, so if the odor or staining keeps returning, consult a professional to identify the source.
This guide is not for someone who only wants a product recommendation. It is for someone who needs to understand the sequence: notice symptoms, inspect the crawl space, interpret the pattern, and decide whether the next step is drainage work, moisture control, pest control, or structural evaluation. A general contractor may be enough for some repairs; a structural engineer is more appropriate when joists, beams, piers, or foundations appear to be carrying damage. If the floor is visibly moving, sloping a lot, or creaking in a new way, I would stop short of guessing and consult a professional.
What crawl space repair symptoms usually point to
Usually, crawl space repair symptoms point to one of five buckets: excess moisture, poor drainage, structural damage, pest activity, or air-sealing and insulation failure. The sign is only the clue; the pattern does the heavy lifting. One symptom rarely tells the full story, which is why crawl space repair symptoms & diagnosis — complete guide has to start with pattern recognition.
Moisture is the usual suspect. In a vented crawl space, warm humid air can condense on cooler framing, ductwork, and subflooring. In an unsealed crawl space, water vapor can rise from exposed soil. If the ground slopes toward the house, bulk water can also enter after rain. So you can smell dampness even when there is no standing water in sight. Moisture can hide in wood long before it looks wet. Sneaky stuff.
Structural symptoms are a different beast. A bouncy floor, sloping floor, gaps at trim, cracked tile, or a ridge line that changes over time can point to joist deflection, beam problems, failing supports, or movement in the foundation. “Deflection” means bending under load. Some deflection is normal in any floor system; the issue is when it becomes enough that doors, tile, or cabinets start telling the story. What is upstairs matters just as much as what is below.
Pests muddy the waters. Rodents, termites, carpenter ants, and other insects like damp, dark spaces. Pest droppings, chewed insulation, and tunneling in wood can look like separate problems, but they often appear with moisture damage because damp wood is easier to infest. If you see active insect tubes, frass, or nesting material, that is a separate inspection path, not just a repair note.
Air quality symptoms can also start in the crawl space. A musty smell that is strongest on humid days, a feeling of stale air, or visible mold on the subfloor can mean the crawl space is communicating with the living area through gaps around plumbing, wiring, or duct chases. The home does not need a full “mold problem” to have a crawl space air problem.
When I sort these crawl space repair symptoms, I look for clusters. Moisture plus odor points one way. Sloping floors plus cracked finishes point another. Pest evidence plus damp insulation points to a different branch again. That is why a careful crawl space repair symptoms & diagnosis process beats a rushed fix.
How do I tell if the crawl space is causing the problem?
The crawl space is probably part of the problem if the symptoms start near the floor line, worsen after rain or humid weather, or repeat in the same rooms every season. That pattern carries more weight than any single clue, and crawl space repair symptoms & diagnosis works best when you compare timing, location, and weather.
Start with the smell. A true crawl space odor is usually earthy, stale, or damp, and it often gets stronger when the HVAC runs or when the air outside turns humid. If the smell is strongest near supply vents, around floor registers, or along baseboards, the crawl space may be communicating with the living space. If the odor is only near one wall and you also see staining or a soft floor edge, I would think about a localized moisture source instead of assuming the entire crawl space is at fault.
Then look at the floor. Use a straight level or a laser level if you have one. A floor that slopes consistently across a room may reflect settlement, while a floor that feels springy in one section may point to undersized joists, damaged subfloor, or a beam support issue. A tiny amount of slope is common in older homes; what matters is change, not just age. If a problem area lines up directly over a damp, moldy, or damaged crawl space bay, the connection becomes more likely.
Next check the relationship to weather. Symptoms that worsen after heavy rain, snowmelt, or long humid periods usually indicate water entry, drainage failure, or vapor issues. Symptoms that do not change with weather can still come from the crawl space, but they raise the odds of structural movement or pests instead. That distinction saves time because it narrows where to look first.
You should also compare the affected room to the crawl space layout. Problems often show up where plumbing lines run, where HVAC ducts pass, or where the house has an addition with different foundations. A transition from one foundation type to another can create a weak point. If the symptoms stop at a seam in the house, that seam is worth attention.
A generic article often says “look for mold.” That is not enough. Mold is a result, not a diagnosis. I would look for source conditions: wet soil, poor grading, clogged gutters, missing downspout extensions, failed vapor barrier seams, plumbing leakage, rotten framing, or insect activity. If the source is not found, any repair is guesswork. For a qualified diagnosis, a home inspector, building envelope specialist, or structural engineer can help sort what is cosmetic from what is structural.
Crawl space repair diagnosis: the step-by-step inspection order
The crawl space repair diagnosis starts outside the house, then moves inside the crawl space, then back up into the living area to compare symptoms. That order matters because a lot of crawl space problems begin with water management at the roofline or foundation edge.
- Walk the perimeter after a normal rain or within 24 hours of one. Check for soil that slopes toward the foundation, downspouts that dump water too close, splash marks, and gutter overflow lines; verify that water is moving away from the house, and if you see pooled water within 6 to 10 feet of the foundation, treat that as a drainage problem instead of a ventilation issue.
- Check the crawl space access and smell before you climb in. Open the hatch and pause for odor, visible moisture, or stale air; verify whether the smell is musty, sewage-like, or earthy, and if you get a sharp sewage odor or strong gas odor, stop and get the right utility or plumbing help because the problem may not be structural at all.
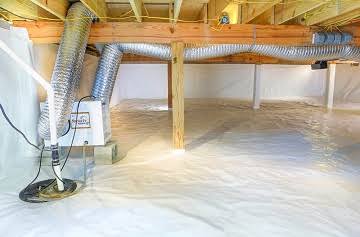
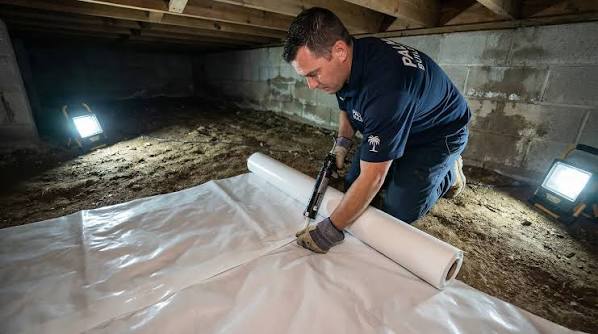
- Inspect the ground cover and moisture conditions. Look at the soil or vapor barrier, if present; verify whether the ground is exposed, torn, or loose at seams, and if you see standing water, wet soil, or mud on the underside of the barrier, the crawl space has an active moisture source that needs investigation before insulation or encapsulation decisions.
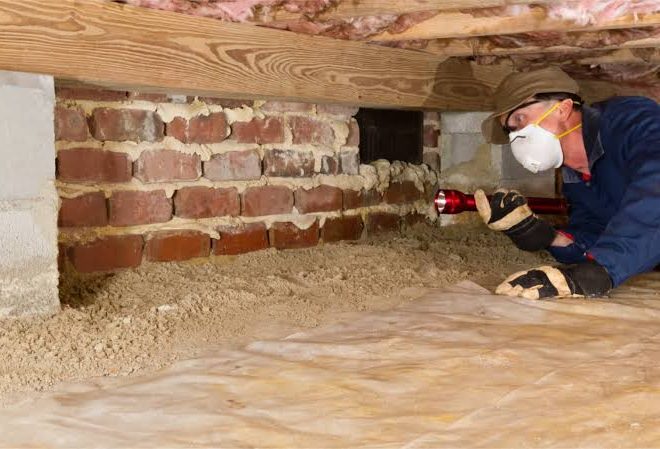
- Examine framing members with a light. Check joists, beams, sill plates, posts, and subfloor edges for staining, softness, dark discoloration, or fungal growth; verify whether damage is surface-level or whether a screwdriver can sink into wood, and if the wood fibers crush easily, that points to decay rather than simple humidity.
- Look at the supports and spacing. Find beam posts, piers, shims, or adjustable steel lally columns if present; verify that supports are plumb and bearing properly on footings, and if you see stacked blocks, tilted posts, or shims that have slipped, the load path may be compromised.
- Check insulation and air pathways. Inspect floor insulation, duct insulation, and gaps around plumbing and wiring penetrations; verify whether insulation is sagging, wet, missing, or contaminated by pests, and if the insulation is damp or falling, it usually means moisture or air leakage is still active.
- Measure the floor above for consistency. Use a long level, laser, or simple reference line across several rooms; verify whether slope is isolated or broad, and if the floor has changed since you first noticed it, that suggests active movement rather than an old, stable condition.
- Document everything before any repair. Take photos of wet spots, damaged wood, stains, pest evidence, and vent locations; verify that you can match each symptom to a location, and if you cannot connect the signs to a specific bay or wall line, the diagnosis is too vague to guide a repair plan.
The order above is not random. Outside water management comes first because it can drive everything else. Moisture assessment comes before cosmetic fixes because wet materials hide the real source. Structural checks come before insulation replacement because insulation should not cover a failing beam or wet subfloor. And documentation matters because a contractor can do a much better job with dated photos than with a vague complaint about “a nasty crawl space.”
A few numbers are worth using here. A crawl space that is less than about 3 feet high is hard to inspect thoroughly and usually needs careful lighting and patience; many are much lower at the edges. If you find more than a light film of moisture on framing, repeated standing water, or visible decay over multiple bays, the issue is no longer a spot repair. At that point, the crawl space repair symptoms & diagnosis process needs a full evaluation of drainage, vapor control, and structure.
The biggest mistake in diagnosis is starting with the symptom you hate most. A musty smell does not always mean mold is the root problem. A soft floor does not always mean the joist itself is failing. I would follow the evidence from outside to inside and from water to structure, not the other way around.
What the signs mean when you see them together
The same symptom can mean very different things depending on what shows up next to it. A single rust spot on a metal duct is not the same as rust on a support post base, and a little condensation on a cold pipe is not the same as sweating on framing across the whole crawl space.
Musty odor plus damp insulation usually points to a moisture and air-sealing issue. The odor comes from damp organic material or mold growth, and the insulation holds moisture against cold surfaces. If the insulation is only sagging in one corner, that corner may be the low point where air movement and water vapor collect. If the odor is strongest near a specific register, the duct path may be drawing air from the crawl space into the home.
Sagging floors plus cracks in tile or drywall are more structural in tone. Tile is unforgiving; it can crack from a change of only a little movement where wood framing deflects under load. Drywall cracks above crawl space supports can point to framing movement or support settlement. Not every crack is serious, but new cracks in a pattern are worth more attention than old hairlines in one isolated place.
Pest signs plus wet wood usually mean the crawl space has become a habitat, not just a void. Termites, carpenter ants, and rodents are more likely when moisture is available. You may see mud tubes, sawdust-like frass, shredded insulation, or gnaw marks. In that case, pest control and moisture control need to be addressed together, because treating only one side leaves the other side intact.
Mold growth plus a recent plumbing stain changes the timeline. If discoloration is near a pipe, drain, or fixture line, the source may be an active or intermittent leak rather than humidity alone. A crawl space can stay damp even after a leak stops, but an old stain with no new moisture behaves differently from a leak that is still feeding the problem. That distinction matters for repair planning.
This is where generic advice often misses the mark. People are told to “dry the crawl space” without asking why it got wet. Drying a space after the source keeps feeding it is a temporary cleanup, not a repair. I would want the source mapped before the finish work starts.
When should you stop guessing and call for qualified help?
Stop guessing when the signs point to active structural movement, ongoing water entry, or possible health hazards from mold, sewage, or pests. That is not caution for its own sake; those are the cases where the wrong repair can waste money or make the problem harder to fix.
Standing water after rain or plumbing use: This means the crawl space has an active water source, not just humidity — get a plumber, drainage contractor, or qualified crawl space professional to trace the entry path.
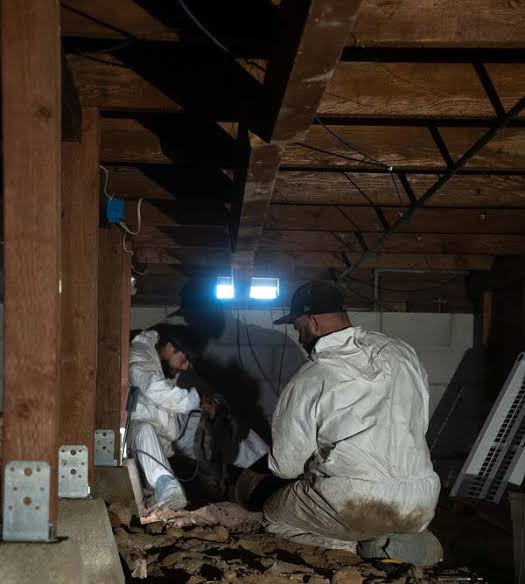
Soft, spongy, or visibly decayed framing: This means wood fibers may be failing, not merely discolored — stop walking on the area and have a structural professional evaluate the load-bearing members.
Posts or piers that are tilted, cracked, or sitting on loose blocks: This means the support path may not be transferring weight properly — a structural inspection is the right next step, not a patch on the floor above.
Strong sewage odor or signs of a damaged drain line: This means the problem may involve wastewater or a venting issue — call the appropriate plumbing professional before entering the crawl space again.
Visible mold over a broad area, especially after repeated wetting: This means moisture has been chronic enough to support growth — a qualified indoor air or building professional should identify the source and scope before cleanup begins. The EPA advises that larger mold problems should be handled by qualified professionals rather than as a simple DIY cleanup.
Active termite tubes, heavy pest droppings, or nesting material: This means pests have access and may be damaging wood or insulation — pest control and a crawl space evaluation should happen together.
Noticeable floor slope that seems new or increasing: This means the structure may be moving — document it and get a professional opinion, especially if doors, cabinets, or tile are also changing.
Electrical components, junction boxes, or damaged wiring in a wet crawl space: This means there is a shock hazard — do not work in the area until the electrical issue is addressed by a licensed electrician.
A lot of readers want a simple threshold. Here is mine: if the problem has crossed from smell and staining into movement, rot, standing water, or utility damage, I would not keep treating it as a home-maintenance job. The consequence of guessing wrong is not just a bad repair. It can mean hidden decay continuing under the floor.
Common crawl space repair mistakes, and what they cost