How to Tell If Your Crawl Space Needs Encapsulation
Last updated: September 10, 2026
Key Takeaways
- Open the hatch and wait 5 to 10 minutes before judging the smell or humidity.
- Verify whether relative humidity is persistently above roughly 60%.
- In a crawl space, a persistent reading above about 60% is a warning sign, even if there is no puddle on the ground.
- This takes about 30 to 60 minutes for a typical home, longer if access is tight or the space is cluttered.
Start with odor, moisture, and humidity. That’s the real triad. A crawl space that smells damp, shows condensation, or keeps pushing moisture into the house deserves a closer look. And no, I do not mean a sealed crawl space in the proper sense — one with a continuous vapor barrier, taped seams, and controlled humidity — not a random sheet of plastic dropped over soil. This article is for a homeowner with a vented or partially vented crawl space, a basic flashlight, and enough access to look, smell, and measure before deciding whether to move forward.
What crawl space encapsulation is actually for
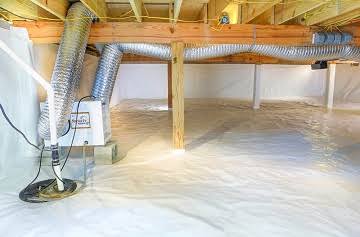
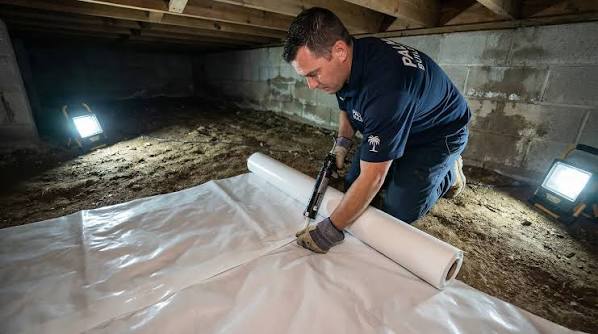
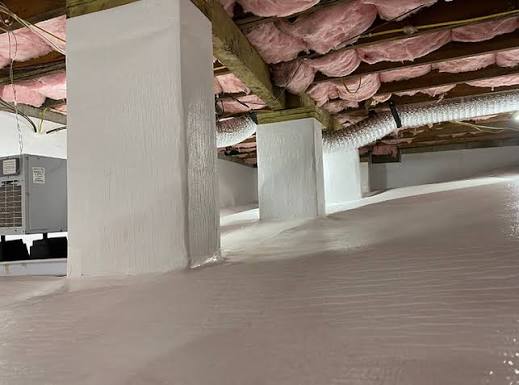
Crawl space encapsulation is meant to cut ground moisture, outside air leakage, and the damp conditions that feed mold, wood decay, and pest activity. It does that by covering the floor and usually the walls with a heavy vapor barrier, sealing vents and leaks, and often adding dehumidification or conditioning. In building terms, a vapor barrier is a low-permeance layer that slows water vapor moving from the soil into the crawl space. A typical crawl-space liner is much thicker than the thin 6-mil plastic used in temporary jobs; many good installations use reinforced material in the 10- to 20-mil range.
I’d judge the need for encapsulation by symptoms, not by a sales pitch. A crawl space that stays dry through wet weather, shows no mold odor, and has stable wood framing may not need the full treatment; if you are unsure, consult a crawl-space professional or building inspector. But when the space turns musty after rain, leaves visible moisture on framing, or makes the first floor feel clammy, the picture changes fast. Like a leaky shoe, it keeps telling on itself.
This is not the right fix for every crawl-space problem. Active bulk water through a foundation crack, standing water after storms, sagging joists, rotten floor framing, or exposed electrical hazards all need attention first; sealing the space before those issues are corrected is the wrong order. The moisture source matters. Encapsulation is for moisture control, not for hiding a drainage failure.
A good first pass is simple: look, smell, and measure. If the soil is bare, the insulation hangs down, the air feels wet, or the relative humidity sits high for long stretches, the crawl space is already failing as a part of the house. Relative humidity is the percentage of moisture in air compared with the maximum it can hold at that temperature. In a crawl space, a persistent reading above about 60% is a warning sign, even if there is no puddle on the ground. According to the U.S. Environmental Protection Agency, moisture control is a core step in preventing mold growth. EPA
How can I tell if my crawl space needs encapsulation?
Check for moisture patterns, air leakage, and damage that keep coming back after dry weather. I’d look for a cluster of signs, not a single clue. One moldy joist alone is not the same as a crawl space that is generally wet, but several symptoms together usually point to the same answer.
Start with your nose. A musty or earthy odor near floor vents, closets over the crawl space, or the access door often means the crawl space is feeding damp air into the house. Then look for white mineral staining on masonry, darkened wood, rust on metal hardware, fallen insulation, or a soil surface that stays damp days after rain. Condensation on ducts or on the underside of floor sheathing is another strong sign. If the crawl space vents are open and the outside air is humid for much of the year, the space may be bringing in more moisture than it removes.
Use a hygrometer, which is a humidity meter, not a guess. Put one in the crawl space and another in the main living area for several days, ideally through a wet stretch and a dry stretch. If the crawl-space reading stays much higher than the house, especially when temperatures swing, that points toward uncontrolled moisture movement. A cheap digital meter is enough for a preliminary check; you do not need lab equipment to see a problem pattern.
Seasonal behavior matters too. If the crawl space smells worse in summer, vents are part of the problem. Warm, humid outdoor air entering a cool crawl space can dump moisture into framing and ducts. If it smells worse after heavy rain, outside water management or grading may be the bigger issue. If the smell never really goes away, the space likely needs more than spot repairs.
The steps I would use to evaluate a crawl space
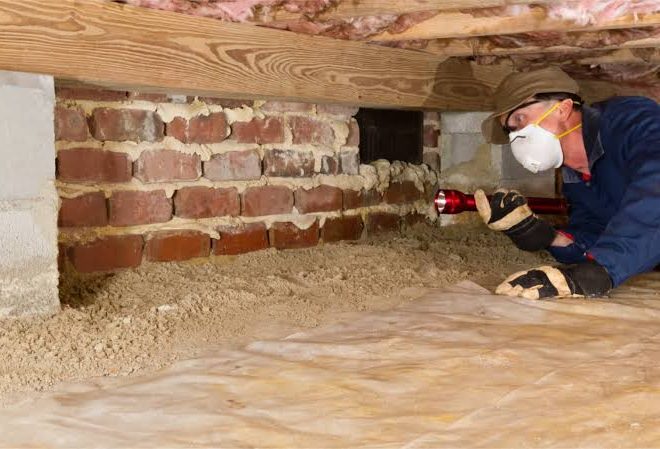
I’d inspect the crawl space in a fixed order so I do not miss the cause behind the symptom. This takes about 30 to 60 minutes for a typical home, longer if access is tight or the space is cluttered. Bring a flashlight, gloves, a simple humidity meter, and something to mark notes.
- Check the crawl space after a normal day, not right after opening the access. Open the hatch and wait 5 to 10 minutes before judging the smell or humidity. Verify whether the air is stale, damp, or neutral. If the odor disappears instantly after fresh air rushes in, note that, but do not dismiss it; a space that traps odor is still controlling indoor air badly.
- Look for standing water, damp soil, or water lines on the foundation. Scan the entire perimeter and the center of the crawl space. Verify whether the soil is dark, soft, or shiny with moisture, and whether any puddle is present. If you see active water, encapsulation alone is not enough until drainage is corrected.
- Inspect wood members for discoloration, softness, or visible mold growth. Pay attention to sill plates, joists, subfloor edges, and support posts. Verify whether staining is old and dry or fresh and dark. If a screwdriver easily dents wood or you see fibrous decay, you may be past the point where sealing is the main answer.
- Measure humidity at crawl-space height and near the floor framing. Put the meter about 12 to 18 inches above the ground and wait for it to stabilize for 5 minutes. Verify whether relative humidity is persistently above roughly 60%. If it is much higher than the living space, the crawl space is out of control even if it looks dry.
- Check the insulation and ductwork. Look for sagging fiberglass batts, compressed insulation, wet duct wrap, or condensation on metal ducts. Verify whether insulation is missing in strips or hanging loose. If ducts are sweating, the space is likely exchanging too much humid air with the house or outdoors.
- Examine vents, gaps, and penetrations. Look at foundation vents, rim joist gaps, plumbing penetrations, and cable cutouts. Verify whether outside air can move freely through them. If daylight, insects, or visible airflow are obvious, the crawl space is not isolated from outdoor humidity.
- Check the ground surface and any existing plastic. If there is plastic, look for tears, open seams, or exposed soil around the edges. Verify whether the barrier is turned up at the walls and sealed, or just lying loose. A barrier with open seams can trap moisture in pockets instead of controlling it.
- Note timing and triggers. Return after rain and again during a humid spell if possible. Verify whether odors, wet spots, or condensation worsen with weather changes. If the pattern tracks weather, encapsulation may help; if it tracks plumbing leaks, fix the leak first.
A good result from this inspection is not “I saw plastic.” It is “the crawl space is dry, the humidity is stable, the framing is sound, and the air no longer smells damp.” If you cannot get to that conclusion from a visual check and a humidity reading, the space needs more diagnosis before anyone spends money. For a second opinion, consult a local crawl-space contractor or home inspector, and compare findings with the EPA’s moisture guidance. EPA
What problems point to encapsulation, and which ones point somewhere else?
Encapsulation is the right tool when the crawl space’s main problem is moisture from the ground or humid outdoor air. It is the wrong tool when the main problem is a plumbing leak, roof leak, failed drainage, or structural decay. That distinction can save money and prevent bad fixes, but if the diagnosis is unclear, consult a qualified professional before you spend on materials.
The strongest signs for encapsulation are these: persistent musty odor, recurring condensation, damp soil, moldy or stained framing without a clear plumbing source, open crawl-space vents in a humid climate, and indoor floors that feel muggy over a crawl-space area. If the crawl space has bare earth and no effective vapor barrier, soil moisture can keep feeding the air year-round. In that situation, encapsulation is usually a sensible next step after basic drainage issues are addressed.
Signs that point somewhere else are just as important. A wet line along one wall after heavy rain often means exterior grading, gutters, downspouts, or footing drainage need attention. A wet spot under a supply line or drain pipe suggests a plumbing repair, not encapsulation. Sagging joists, cracked beams, or major rot mean a structural evaluation comes first. If your HVAC air handler or ductwork is in the crawl space and heavily sweating, insulation, duct sealing, or equipment changes may be part of the solution too.
Climate matters as well. In hot-humid regions, open vents often invite moist air into a cool crawl space. In colder climates, the answer can depend on venting, insulation, and whether the crawl space holds mechanical equipment; local building practice, not a generic rule, should settle the final design. Building code practice in the United States often follows the International Residential Code, but local amendments matter more than a generic internet rule. IRC via ICC
The judgment is simple: encapsulate when you have a moisture-control problem that keeps returning despite basic upkeep. Do not encapsulate as a substitute for fixing water entry, rotten framing, or unsafe systems. For code-sensitive projects, the U.S. Department of Energy also has guidance on crawl-space moisture and air sealing. DOE
When should I stop and call the problem something else?
Stop treating this as a simple encapsulation decision when the crawl space shows signs of active water, damage, or unsafe conditions. Those cases need the underlying problem handled first, because sealing the space can trap moisture, hide the source, or make the damage harder to see. If the issue is beyond a basic visual check, consult a mold, drainage, or structural specialist.
Standing water after storms: This means bulk water is entering faster than the space can dry — fix drainage, gutters, downspouts, grading, or footing drainage before sealing anything.
Soft, crumbling, or deeply stained wood: This means decay may already be affecting structure — get qualified structural or repair help before you plan encapsulation.
Mold growth covering a large area: This means the crawl space has had long-term moisture exposure — address the moisture source first, then decide whether cleaning and sealing make sense.
Active plumbing leaks or condensation from pipes: This means moisture is coming from a mechanical source, not the soil — repair the plumbing and insulation before considering a barrier.
Electrical hazards, open junction boxes, or damaged wiring: This means the space is unsafe to work in — stop and have the hazard corrected before anyone enters to install or inspect materials.
Loose debris, insulation, or trash blocking access: This means you cannot inspect the full area reliably — clear the space first, or you may miss the real cause and buy the wrong fix.
I’d also stop if the crawl space has no safe access, low clearance that makes movement dangerous, or evidence of pests so severe that cleanup is needed first. Encapsulation is a finishing move, not a bandage over chaos.
The mistakes people make before they encapsulate
The most common mistake is covering wet soil without fixing drainage. The consequence is trapped moisture, trapped odor, and a liner that hides the real problem. The correct alternative is to solve the water entry path first, then install the barrier.
Another mistake is using thin, loose plastic and calling it encapsulation. A 6-mil sheet draped on the dirt tears easily and leaves seams unsealed. Better to use a heavier, continuous vapor barrier with overlapped, taped seams and sealed edges.
A third mistake is leaving vents open because “airflow must be good.” In a humid climate, open vents often feed moisture into the crawl space instead of drying it. The correct alternative is to judge ventilation by climate and moisture behavior, not by habit.
A fourth mistake is ignoring the rim joist and wall penetrations. Even a good floor liner does little if humid air keeps leaking around pipes, cables, or the band board. Seal the obvious leakage points as part of the system.
A fifth mistake is forgetting dehumidification when the space still needs moisture control. Encapsulation reduces moisture entry, but some crawl spaces still need a dehumidifier to hold humidity down during wet periods. The correct alternative is to check humidity after sealing and add control only if readings stay high.
A sixth mistake is treating visible dryness as proof that the problem is gone. Dry-looking soil can still release vapor into the space. The correct alternative is to confirm with a meter and repeat checks in different weather, and if the readings do not make sense, consult a crawl-space professional.
What if my crawl space is unusual?
Modify the usual advice if the crawl space has a concrete slab, radon concerns, very low clearance, or mechanical equipment that depends on outside air. A slab crawl space may still need air sealing and humidity control, but the details differ because you are not covering bare soil. If radon is a concern in your region, sealing the crawl space can be part of a radon strategy, but radon mitigation should follow the relevant guidance from the U.S. Environmental Protection Agency or a certified radon professional, not a guess. EPA radon guide
Low-clearance spaces are hard to inspect and even harder to seal well. If the crawl space is only a few feet high, a partial visual check can miss damaged areas, and material installation quality tends to suffer. Mechanical equipment complicates the job too. A furnace, water heater, or air handler in the crawl space changes the humidity and combustion-air picture. In those cases, I would not rely on a simple yes/no answer from a quick inspection.
Climate matters as well. In a hot-humid area, vented crawl spaces fail more often because outdoor air carries moisture inside. In a dry climate, vented spaces may be less troublesome, though they can still pick up ground moisture or plumbing leaks. Local building practice, not generic advice, should settle the final design.
If the crawl space already has damage but no active leak, a staged approach often works best: repair water entry, remove damaged materials, seal air leaks, install the vapor barrier, and then decide whether dehumidification is necessary. That sequence matters more than the brand of anything used.
FAQ: the questions people ask when the crawl space smells wrong
How do I know